Configure Atolio for your organization by setting up authentication providers, data source connectors, and AI services.
This is the multi-page printable view of this section. Click here to print.
Configuration
Configure Atolio authentication, data sources, and AI services
- 1: Authentication
- 1.1: Google
- 1.2: Keycloak
- 1.3: Microsoft Entra ID
- 1.4: Okta
- 2: Connectors
- 2.1: Atlassian Bitbucket Connector
- 2.2: Atlassian Confluence Connector
- 2.3: Atlassian Connector for Jira & Confluence Data Center
- 2.4: Atlassian Jira Connector
- 2.5: Box Connector
- 2.6: GitHub Connector
- 2.7: GitLab Connector
- 2.8: Gong Connector
- 2.9: Google Connectors
- 2.9.1: Gmail Connector Setup
- 2.9.2: Google Chat Connector Setup
- 2.9.3: Google Drive Connector Setup
- 2.9.4: Google Sites Connector Setup
- 2.10: HubSpot Connector
- 2.11: Keycloak Connector
- 2.12: Linear Connector
- 2.13: Microsoft Connectors
- 2.13.1: OneDrive Connector Setup
- 2.13.2: Outlook Connector Setup
- 2.13.3: SharePoint Connector Setup
- 2.13.4: Teams Connector Setup
- 2.14: Notion Connector
- 2.15: Okta Connector
- 2.16: Salesforce Connector
- 2.17: ServiceNow Connector
- 2.18: Slack Connector
- 2.19: SolarWinds Service Desk Connector
- 2.20: Staffbase Connector
- 2.21: Web Connector
- 2.22: Zendesk Connector
- 2.23: Zoom Connector
- 2.24: Zulip Connector
- 3: Admin
- 4: LLM Providers
- 4.1: Anthropic
- 4.2: AWS Bedrock
- 4.3: Azure Foundry
- 4.4: Google Gemini
- 4.5: OpenAI
1 - Authentication
This document describes the necessary steps to setup authentication through your desired single sign-on (SSO) provider: Microsoft Entra ID, Okta, or Google.
Atolio requires a single sign-on (SSO) provider for two purposes:
- To enable authentication using the OpenID Connect (OIDC) protocol, as outlined in this document.
- To support user mappings, ensuring that a user’s identity is mapped correctly across the variety of sources where those users do their work. Refer to configuring sources for additional information.
Note: For particular connectors (e.g. Google Drive, Gmail), the steps outlined below for Google are also required even if your authentication provider is different (e.g. Okta).
Identity Provider Configuration
1.1 - Google
Use Google as your Identity Provider.
Create OAuth Client
Note: The instructions in this section are only needed when Google is used for authentication of the Atolio web application.
Create a new project in the Google Cloud Console by visiting https://console.cloud.google.com/cloud-resource-manager and clicking CREATE PROJECT. Provide a project name (e.g. Atolio) and select the correct Organization and Location. Note the Project ID field displayed below the Project name. You’ll need this value when setting up Terraform later. Click CREATE.
This project will be used to create credentials for the Google OAuth Client (for authenticating Atolio users) and to create necessary resources to (allow) access to the Google Workspace by the Atolio stack later on.
Create the Google OAuth Client using the following steps:
- Visit https://console.cloud.google.com/apis/credentials/consent to set up the OAuth consent screen.
- Select Internal for User Type and click CREATE.
- Provide Atolio for the App name and enter email addresses for both support and developer contact information.
- Press SAVE AND CONTINUE.
- In the next Scopes screen there is no need for changes, just click SAVE AND CONTINUE again.
- Review your changes in the next Summary screen and click BACK TO DASHBOARD.
The OAuth credentials (client ID and secret) can now be created by:
- Navigating to https://console.cloud.google.com/apis/credentials and clicking CREATE CREDENTIALS in the top menu bar.
- Then select OAuth client ID from the drop down menu.
- For application type on the next screen choose Web application and fill out the rest of the form as shown in the table below (using your own domain name instead of the example).
- Click CREATE. The OAuth client will be created providing you with a Client ID and Secret.
- Download the JSON file.
| Field Name | Field Value |
|---|---|
| Application type | Web application |
| Authorized JavaScript origins | https://search.example.com |
| Authorized redirect URIs | https://search.example.com/auth/_callback |
The client ID and secret which will be needed later in the deployment process as described below. We recommend storing this information in a safe place (e.g. 1Password secure note) to be shared with your Deployment Engineer.
Setup Google Connector
Once your Atolio infrastructure has been deployed, you will also need to setup the Google Connector so that Atolio can resolve each signed-in user to their Atolio identity and user mappings.
1.2 - Keycloak
Use Keycloak as your Identity Provider.
Configure Keycloak as your identity provider for user authentication. Atolio signs users in using the OpenID Connect authorization code flow against a client you create in your Keycloak realm.
Create OIDC Client
Note: The instructions in this section are only needed when Keycloak is used for authentication of the Atolio web application.
- Sign in to the Keycloak admin console and select the realm your users authenticate against from the realm selector in the top-left.
- Navigate to “Clients” and click “Create client”.
- Leave “Client type” set to “OpenID Connect”, enter a “Client ID” (e.g.
atolio), and click “Next”. - Turn on “Client authentication” so the client is confidential and issues a client secret. Leave “Standard flow” enabled under “Authentication flow”; the other flows are not required. Click “Next”.
- Under “Valid redirect URIs”, add
https://search.example.com/auth/_callback(replacesearch.example.comwith your actual Atolio deployment URL; contact your Atolio onboarding support team if you need clarification on the correct URL). - (Optional) Set “Valid post logout redirect URIs” and “Web origins” to
https://search.example.comto scope sign-out and CORS to your deployment. - Click “Save”.
- Open the “Credentials” tab and copy the “Client secret”. Save it for later.
The profile and email scopes are part of Keycloak’s default client scopes, so the realm already returns the claims Atolio needs. No custom scope or mapper configuration is required.
Provide Configuration
Provide the following values to your Deployment Engineer to complete OIDC configuration. We recommend storing these in a safe place (e.g. a 1Password secure note).
Issuer URL, the realm issuer in the formhttps://keycloak.example.com/realms/<realm>(replace the host and<realm>with your values)Client ID, the client identifier created above (e.g.atolio)Client Secret, the secret copied from the “Credentials” tab
Setup Keycloak Connector
Once your Atolio infrastructure has been deployed, you will also need to setup the Keycloak Connector so that Atolio can resolve each signed-in user to their Atolio identity and user mappings.
1.3 - Microsoft Entra ID
Use Microsoft Entra ID as your Identity Provider.
Configure Microsoft Entra ID as your identity provider for user authentication. This App Registration is specifically for authentication purposes and user/group identity mapping.
Create New App Registration
- Authenticate to the Azure Portal via your Microsoft Identity.
- Head over to App Registrations.
- Click “New Registration”:
- Enter “Atolio Authentication” for the name.
- Ensure “Accounts in this organizational directory only” is selected from Supported account types.
- Add a redirect URI
https://search.example.com/auth/_callback(replacesearch.example.comwith your actual Atolio deployment URL - contact your Atolio onboarding support team if you need clarification on the correct URL). - Click “Register”.
- You should now be on the page of your new app registration. In the Essentials blade, locate the “Add a certificate or secret” link.
- Create a Client Secret for use with OIDC:
- Select the “Client Secrets (0)” tab.
- Click “New Client Secret”.
- Enter “Atolio OIDC Authentication” for the description.
- Set desired expiry. Follow internal procedures for rotation.
- Copy the newly created “Value” of the Client Secret and store it in a safe place (e.g. 1Password). This will be referenced later for OIDC configuration.
- Add a certificate for client authentication:
- Obtain a
.PFXfile that includes the public and private keys. The certificate key algorithm must be RSA. A private key password is optional, but recommended. - Export the public key to a
.CERfile. - Select the “Certificates (0)” tab.
- Click “Upload certificate”.
- Enter “Atolio Client Authentication” for the description.
- Select the
.CERfile and select “Add”. - Export the
.PFXfile contents to base 64 and store it in a safe place (e.g. 1Password). You can obtain the base 64 encoding from the command line withcat my-cert.pfx | base64. This value will be referenced later for source configuration.
- Obtain a
- Add Microsoft Graph API Permissions:
- In your App Registration, click “API permissions” in the left menu
- Click “Add a permission”
- Select “Microsoft Graph”
- Click “Application permissions” (not Delegated permissions)
- Add these permissions:
| Permission | Purpose |
|---|---|
Application.Read.All | Resolve service principals and applications |
Group.Read.All | List Microsoft 365 and security groups |
GroupMember.Read.All | Resolve group membership for ACL mapping |
User.Read.All | Resolve user objects and properties |
Directory.Read.All | Extended directory objects (optional*) |
*Optional: You can omit Directory.Read.All and set disable_full_permissions: true in your configuration for more restrictive access.
⚠️ Important: This App Registration should only contain the directory permissions listed above. Do not add content source permissions (Files, Sites, Teams, etc.) to this registration.
Grant Admin Consent:
- Click “Grant admin consent for [your tenant name]” at the top of the API permissions page
- Confirm by clicking “Yes”
- Verify all permissions show “Granted for [your tenant name]” with green checkmarks
Finally, revisit the app registration Overview and copy the Directory (tenant) ID as well as the Application (client) ID. These will be used later when configuring Entra ID authentication.
Sample Configuration
Here’s a complete YAML configuration example for Entra ID as an identity provider:
connector: microsoft
source: entraid
common:
  enabled: true
  identity-provider: true     # This is the identity provider
  cron-spec: "0 */1 * * *"   # Sync users/groups every hour
secrets:
  client_secret:
    value: "<CLIENT_SECRET_VALUE>"  # From step 5 above
  client_cert:
    value: "<BASE64_ENCODED_PFX_CONTENT>"  # From step 6 above
  client_cert_password:
    value: "<CERTIFICATE_PASSWORD>"  # Optional if no password set
configuration:
  client-id: "<APPLICATION_CLIENT_ID>"      # From step 7 above
  tenant-id: "<DIRECTORY_TENANT_ID>"        # From step 7 above
  disable_full_permissions: true           # Optional: reduces required permissions
Configuration Notes:
identity-provider: true- Marks this as the identity provider sourceclient_secret- Required for OIDC authentication flowclient_cert- Required for Microsoft Graph API access to sync users/groupsdisable_full_permissions: true- OmitsDirectory.Read.Allpermission if you prefer more restrictive access
Important: Separate App Registrations for Content Sources
This App Registration is specifically for authentication and identity provider purposes.
For security and scalability best practices, create separate App Registrations for each Microsoft content source (SharePoint, Teams, OneDrive, Outlook) you plan to configure. Each content source should have its own dedicated App Registration with only the minimum permissions required.
See the individual connector documentation:
1.4 - Okta
Use Okta as your Identity Provider.
Create OAuth Client
Note: The instructions in this section are only needed when Okta is used for authentication of the Atolio web application.
- Navigate to Applications in the Okta admin console (
https://example.okta.com/admin/apps/active). - Click “Create App Integration”.
- Select “OIDC - OpenID Connect” from the list of Sign-in methods.
- Select “Web Application” from the list of Application types and hit “Next” to create the app.
- (Optional) Edit the name and provide the Atolio logo for the app.
- Under “Grant type” –> “Client acting on behalf of a user”, ensure that “Authorization Code” is enabled.
- Under “Sign-in redirect URIs”, add the URL
https://search.example.com/auth/_callback(note this is identical for Google). - Under “Sign-out redirect URIs”, remove the default
http://localhost:8080URI. - Under “Assignments”, choose who should have access to the Atolio app. This setting can be modified later. If you choose to “Skip group assignment for now”, remember to add yourself to the Assignments list in order to be able to sign-in.
- Click “Save”.
- Under “Client Credentials”, copy the “Client ID” & “Client Secret” and save them for later.
Setup Okta Connector
Once your Atolio infrastructure has been deployed, you will also need to setup the Okta Connector to enable users and user mappings using an API token.
2 - Connectors
Note: Configuration of sources is regularly evolving. This document covers responsibilities shared by both the Deployment Engineer and Admin. As of v4.24, Admins can configure sources directly through the Admin console without requiring Deployment Engineer intervention for most configurations.
Atolio can be configured to index content across a variety of sources. This document describes the steps required in both the source systems and within Atolio:
- First, follow the steps required in the source system (links provided below).
- Then, configure the Atolio connector in your environment using one of the methods outlined in Atolio Configuration.
Atolio Configuration
As of v4.24, there are two methods available for configuring sources in Atolio:
Method 1: Admin Console (Recommended for v4.24+)
Admins can now configure sources directly through the Atolio Admin console without requiring access to the Kubernetes cluster. This browser-based interface provides an intuitive way to manage all available sources.
To configure sources via the Admin console:
- Navigate to the Admin panel in Atolio
- Select “Connectors” or “Sources” from the menu
- Choose the source you want to configure
- Fill in the required credentials and configuration settings through the UI
- The configuration is immediately applied to your deployment
Advanced Configuration Options:
The Admin console provides flexible configuration management:
- YAML Editor: Edit configurations directly in an embedded YAML editor for fine-grained control
- Upload: Import existing YAML configuration files (exported from
atolioctlor previously downloaded) - Download: Export your current connector configurations as YAML files for backup, documentation, or migration to other environments
This approach allows you to seamlessly work with the same YAML configuration format that atolioctl uses, whether you prefer the form-based UI or direct YAML editing.
Method 2: atolioctl (Traditional - For Deployment Engineers)
For users who prefer command-line configuration or need advanced options, atolioctl remains available. This terminal-based UI (TUI) allows your Deployment Engineer to configure all available sources from the command line.

Installing atolioctl
Atolio provides an installer script within the lumen-infra repository that will automatically grab the latest version of atolioctl and install it locally.
Note: The installer script requires that you have
curlorwgetinstalled:
- Navigate to the
lumen-infrarepository and into the scripts directory
cd lumen-infra/deploy/terraform/scripts
- Run the installer script
./get-atolioctl.sh
- From there, you should be able to run the tool:
atolioctl --help
You can re-run this script to download the latest version of atolioctl or run the script with the --version flag to install a specific version of atolioctl, ex:
./get-atolioctl.sh --version 4.10.2
Deploying Connectors
Prior to configuring a source, the connector (ie the deployment in which the source will run on) must be deployed. Atolio uses the concept of instances to support one or more instances of a source (eg multiple tenants), and the creation of these deployments is managed by modifying values-lumen.yaml. Specify connectors like so:
connectors:
  microsoft:
    default:
      enabled: true
  okta:
    default:
      enabled: true
  jiracloud:
    default:
      enabled: true
Connectors are deployed under a default instance. This is an identifier which can be changed as desired, and multiple connectors can be deployed under different instances. Once the instance is set, it should be treated immutable. Modifying this value will result in loss of data and a need to re-index under the new instance. This is due to the instance being part of every resource identifier ingested by Atolio.
  jiracloud:
    internal:
      enabled: true
    external:
      enabled: true
Customizing Connector Deployments
The above YAML examples are the minimal definitions required to deploy a connector to your Atolio cluster. There are additional properties that can be set in your values-lumen.yaml file as directed by your Atolio support team to apply different options. For example:
connectors:
  google:
    default:
      enabled: true
      lumenImageTag: 4.13.0-alpha1
      log:
        level: "debug"
      resources:
        requests:
          cpu: 500m
          memory: 2Gi
        limits:
          cpu: 1000m
          memory: 4Gi
To provision the updates into the cluster, you’d upgrade the lumen Helm chart by running create-infra.sh (recommended) or:
helm upgrade lumen-chart ../../k8s/charts/lumen --values values-lumen.yaml --values values-lumen-templated.yaml -n atolio-svc
Configuring Sources via atolioctl
This section details how to configure sources using atolioctl, including how to obtain the necessary JWT. atolioctl can be obtained through the Releases page.
Tip: Starting in v4.24, most users should use the Admin console method above instead of
atolioctl. The Admin console provides a user-friendly browser interface without requiring command-line access.
First an API token needs to be created for use with atolioctl. This token can be generated as follows using the config.hcl file that was used to run the create-infra.sh script:
export JWT_TOKEN=$(atolioctl connector create-jwt --raw --config-dir . "atolio:*:*:*")
Feeder exposed on Load Balancer
To run configuration, provide the configure command to atolioctl. Make sure to use the correct API host name for your deployment. Once loaded, you should see a collection of configuration options and sources in your terminal:
atolioctl configure --jwt-token-sdk ${JWT_TOKEN} --feeder-address feed.search.example.com:443
Port Forwarding (Feeder not exposed on Load Balancer)
To run configuration, port-forward 8889 from service/feeder and provide the configure command to atolioctl. Ensure the correct AWS profile is in context. Once loaded, you should see a collection of configuration options and sources in your terminal:
kubectl port-forward -n atolio-svc service/feeder 8889
atolioctl configure --jwt-token-sdk ${JWT_TOKEN} --feeder-address :8889
Note that for the time being all atolioctl commands below (unless noted otherwise) will require the port forwarding command.
Configuration Tips
To obtain source-specific information, head to source configuration and find the source you’re interested in configuring. Some tips when running atolioctl:
- Run the application in a maximized window to ensure full visibility of all information.
- Press
?to toggle the help menu / key map. You will typically use up/down arrows and<TAB>to navigate the menus. - No data is persisted until
Review & Saveis selected and validation has completed. A report will be shown detailing which sources were successfully configured and which not.
YAML Configuration Format
Atolio uses YAML format for source configurations. This format is used consistently across both the Admin console and atolioctl, allowing you to easily switch between methods or export/import configurations.
YAML export/import with atolioctl
As a reminder, the stack is not yet running at this point. Configuration of most sources does not require an operational stack as the validation is simply making a call to the source API and there is no expectation of the source’s connector running yet. There are some exceptions (in particular Jira, Confluence, and BitBucket)
Once desired sources have been configured and the stack deployed, you can import the pre-configured file using atolioctl. Note at this point it’s expected Feeder is operational and port-forwarding to the service address can occur:
atolioctl configure import atolio.yaml --jwt-token-sdk ${JWT_TOKEN} --feeder-address :8889
Writing key: /lumen/connectors/github/default/github
Writing key: /lumen/connectors/linear/default/linear
Writing key: /lumen/connectors/notion/default/notion
Writing key: /lumen/connectors/slack/default/slack
Writing key: /lumen/connectors/web/default/web
Writing key: /lumen/connectors/bitbucket/default/bitbucket
Similarly, source configuration of the stack can be exported to a local file. This can be useful if wishing to view the entire configuration in a human-readable YAML file, or perhaps store a backup of the configuration in a vault like 1Password. This file will be in the same format as the one imported in the prior step, allowing a loop of export, modify, import:
atolioctl configure export --jwt-token-sdk ${JWT_TOKEN} --feeder-address :8889 atolio.yaml
Both export and import commands can also combined into a single edit command that exports the current source configuration into a text editor (specified by the EDITOR environment variable) allowing manual edits. Upon saving/closing the editor, the configuration will be imported. This command is invoked a follows:
atolioctl configure edit --jwt-token-sdk ${JWT_TOKEN} --feeder-address :8889
Common Fields: Resources
Atolio supports the ability to avoid certain content from being indexed at all. The example below shows how to specifically exclude a Jira project (with the project key “SP”).
When configuring the Jira source, enter the following in the Resources field:
project:
    excluded:
        - "SP" # The Secret Project
The excluded keyword contains a list of Jira project keys to be excluded from indexing. Similarly you can also use the included keyword to achieve the opposite (in that case only those resources that are specifically listed will be indexed, nothing else). Note that the list entries (e.g. SP in the example above) are case sensitive.
In the absence of both included (opt-in) or excluded (opt-out), everything that the credentials (e.g. API key) have access to will be indexed. Note that this is a layer on top of the permissions model provided to the source. Anything added to included will only be indexed if the underlying credentials grant the indexing job access.
This feature is supported by a majority of Atolio connectors, see each connectors respective documentation for details and scope of inclusions / exclusions.
Source Configuration
2.1 - Atlassian Bitbucket Connector
Index repositories, projects, pull requests, commits, and comments in Bitbucket.
The Atlassian Bitbucket connector indexes repositories, projects, pull requests, commits, and comments across your Bitbucket instance.
The connector supports Atlassian Bitbucket Cloud.
Installing the Bitbucket App Descriptor
In order to target your specific Atolio deployment, the Atlassian Bitbucket connector requires a private listing to be installed instead of the Atlassian marketplace version. This can be disabled again after the connect app is installed.
In your Bitbucket instance:
- Under
Settings->Workplace settings, navigate toInstalled appsunder theAPPS AND FEATURESsection. - After clicking Enable development mode, click the link for
Install app from URL.

- Specify the URL provided by your Deployment Engineer. It will be similar to the following with your chosen DNS name:
https://relay.search.example.com/connectors/bitbucketcloud/default/install/atlassian-connect.json- Note: if you have multiple Bitbucket instances, please make sure to provide the correct instance name in the URL above (i.e.
defaultin the example).
Once the Atolio Connect app has been installed, the configuration will be stored securely in your Atolio deployment. You can now disable the development mode as needed.
2.2 - Atlassian Confluence Connector
Index spaces, pages, and comments in Confluence.
The Atlassian Confluence connector indexes spaces, pages, and comments across your Confluence instance.
The connector supports Atlassian Confluence Cloud.
Installing the Confluence app
Atolio connects to Confluence Cloud through an Atlassian Forge app that is unique to your deployment. A site administrator installs it once with the Forge CLI; afterwards Atolio manages the connection and its API credentials automatically.
Prerequisites
- Administrator access to your Confluence Cloud site.
- Node.js and the Forge CLI:
npm install -g @forge/cli. - Your deployment’s connector URL, provided by your Deployment Engineer (for example
https://relay.search.example.com/connectors/confluencecloud/default). - If you set up this connector on an Atolio version earlier than 4.24 as a “Connect Module”, uninstall the previous Atolio Confluence app first (in Confluence: Apps → Manage your apps).
Steps
Confirm with your Deployment Engineer that the connector is deployed and reachable at the URL above. Empty/partial configuration is okay at this point.
Create a new empty folder for the app, and download your deployment’s pre-filled manifest into it as
manifest.yml.mkdir atolio-confluence-app && cd atolio-confluence-app curl -o manifest.yml https://relay.search.example.com/connectors/confluencecloud/default/forge-manifest.ymlIf you run more than one Confluence instance, use the matching instance name in the URL (
defaultabove).Log in:
forge loginIt will prompt you to provide an email, and then a token. If no token was created before, visit the link displayed by the CLI, press “Create API token with scopes” button, select “Forge” app, and continue.
Register the Forge app:
forge register "Atolio Confluence Connector"It will prompt you to select a “Developer Space” to host the app. If no developer space was created before, provide a name such as “Your-Company Developer Space” to create a new one, and continue.
Note: This step should be executed only once, otherwise a duplicate with the same name would be registered. See Troubleshooting for instructions to delete accidental duplicates.
Deploy and install it on your site:
forge deploy -e production
forge install -e production --site your-site.atlassian.net --product confluence
Once installed, the app registers itself with your Atolio deployment and indexing begins automatically. The connection is stored securely in Atolio — there is nothing further to configure.
(Optional) Scope Confluence indexing
If you want fine-grained control over which Confluence spaces should be indexed, provide a list of inclusions or exclusions to your Deployment Engineer: they can use the includes or excludes feature in Atolio configuration to control the relevant spaces that should be indexed.
Troubleshooting
Multiple Atolio Confluence apps are displayed on app management page
This likely means forge register step above is executed more than once. To fix it:
Open the developer console. It lists every app you have registered, along with each app’s ID.
Ask your Deployment Engineer which app your connector deployment is bound to.
Keep that app. For each of the others, uninstall it from your site:
forge uninstall --app-id-override <app-id>Use the app ID as shown in the developer console, not the full
ari:cloud:ecosystem::app/...value.Once an app has no installations left, delete it from the developer console.
2.3 - Atlassian Connector for Jira & Confluence Data Center
Index content from your Jira DC & Confluence DC environments.
The Atlassian Connector for Jira & Confluence Data Center indexes:
- Projects, issues, comments, and attachments across your Jira instance.
- Spaces, pages, blog posts, comments, and attachments across your Confluence instance.
- Users and groups in Jira & Confluence for the purpose of understanding permissions.
The connectors authenticate to Jira and Confluence as a dedicated service user using a Personal Access Token (PAT). They run as part of your Atolio deployment — no plugin or app needs to be installed in Jira or Confluence.
Note: Earlier releases of this connector shipped as Atlassian SDK plugins (
jira-dc-connector-*.jarandconfluence-dc-connector-*.jar) installed via Manage apps. Clients are encouraged to migrate to the new connectors described below.
Create a Service User
In each of Jira DC and Confluence DC, create a dedicated user for Atolio to authenticate as (for example, atolio-connector-user).
You have two options for the permission scope you grant this user:
Option 1 — Administrator access (recommended for easy setup). Grant the service user administrator membership:
- In Jira, add the user to the Jira Administrators group (or an equivalent admin role).
- In Confluence, add the user to the Confluence Administrators group (or grant System Administrator).
With admin access, the connector automatically registers the webhook it needs for live updates on startup. No further setup is required in Jira or Confluence.
Option 2 — Read-only access. Grant the service user only the permissions required to read the content you want indexed:
- In Jira, grant Browse Projects on every project to be indexed (the easiest way is to add the user to the default permission scheme).
- In Confluence, grant View permission on every space to be indexed (the easiest way is to add the user to the default space permission scheme).
Read-only access means the connector cannot register its own webhook. You can either:
- Skip webhook registration entirely — the connector will still backfill and periodically resync, but changes in Jira and Confluence will not be reflected live, or
- Register the webhook manually (see Manual Webhook Setup below).
Create a Personal Access Token
For each of Jira and Confluence:
- Log in as the service user.
- Go to Profile → Personal Access Tokens → Create token.
- Give the token a name (e.g.
atolio-connector-token) and set an expiry if required by your policy. - Copy the token — this is the value you will provide to your Deployment Engineer.
Provide Configuration
Provide the following to your Deployment Engineer for each connector instance:
base-url: the base URL of the Jira or Confluence DC instance, e.g.https://jira.example.comorhttps://confluence.example.com.personal_access_token(secret): the PAT created in the previous step.disable-webhook-registration: set totrueif the service user is read-only or if you want to manage the webhook yourself. Defaults tofalse.
You can optionally restrict indexing to specific projects (Jira) or spaces (Confluence) via the resources field — see Common Fields: Resources.
Manual Webhook Setup
If the service user does not have admin permissions, or if you prefer to manage webhooks yourself, register the webhook manually after the connector is running. Set disable-webhook-registration: true in the connector configuration to prevent the connector from attempting to register one.
Jira
- In Jira, go to Administration → System → WebHooks → Create a WebHook.
- Set the URL to
{callbackBaseURL}/connectors/jiradc/{instance}/callback, where{instance}is the connector instance name (e.g.default). Your Deployment Engineer can provide the correctcallbackBaseURL. - Enable the following events:
jira:issue_created,jira:issue_updated,jira:issue_deletedcomment_created,comment_updated,comment_deletedproject_created,project_updated,project_deleted
Confluence
- In Confluence, go to Administration → General Configuration → Webhook → Create webhook.
- Set the URL to
{callbackBaseURL}/connectors/confluencedc/{instance}/callback, where{instance}is the connector instance name (e.g.default). Your Deployment Engineer can provide the correctcallbackBaseURL. - Enable the following events:
page_created,page_updated,page_removed,page_trashed,page_restoredblog_created,blog_updated,blog_removed,blog_trashed,blog_restoredcomment_created,comment_updated,comment_removedspace_created,space_updated,space_removed
2.4 - Atlassian Jira Connector
Index projects, issues, and comments in Jira.
The Atlassian Jira connector indexes projects, issues, and comments across your Jira instance.
The connector supports Atlassian Jira Cloud.
Installing the Jira app
Atolio connects to Jira Cloud through an Atlassian Forge app that is unique to your deployment. A site administrator installs it once with the Forge CLI; afterwards Atolio manages the connection and its API credentials automatically.
Prerequisites
- Administrator access to your Jira Cloud site.
- Node.js and the Forge CLI:
npm install -g @forge/cli. - Your deployment’s connector URL, provided by your Deployment Engineer (for example
https://relay.search.example.com/connectors/jiracloud/default). - If you set up this connector on an Atolio version earlier than 4.24 as a “Connect Module”, uninstall the previous Atolio Jira app first (in Jira: Apps → Manage your apps).
Steps
Confirm with your Deployment Engineer that the connector is deployed and reachable at the URL above. Empty/partial configuration is okay at this point.
Create a new empty folder for the app, and download your deployment’s pre-filled manifest into it as
manifest.yml.mkdir atolio-jira-app && cd atolio-jira-app curl -o manifest.yml https://relay.search.example.com/connectors/jiracloud/default/forge-manifest.ymlIf you run more than one Jira instance, use the matching instance name in the URL (
defaultabove).Log in:
forge loginIt will prompt you to provide an email, and then a token. If no token was created before, visit the link displayed by the CLI, press “Create API token with scopes” button, select “Forge” app, and continue.
Register the Forge app:
forge register "Atolio Jira Connector"It will prompt you to select a “Developer Space” to host the app. If no developer space was created before, provide a name such as “Your-Company Developer Space” to create a new one, and continue.
Note: This step should be executed only once, otherwise a duplicate app with the same name would be registered. See Troubleshooting for instructions to delete accidental duplicates.
Deploy and install it on your site:
forge deploy -e production
forge install -e production --site your-site.atlassian.net --product jira
Once installed, the app registers itself with your Atolio deployment and indexing begins automatically. The connection is stored securely in Atolio — there is nothing further to configure.
(Optional) Scope Jira indexing
If you want fine-grained control over which Jira projects should be indexed, provide a list of inclusions or exclusions to your Deployment Engineer: they can use the includes or excludes feature in Atolio configuration to control the relevant projects that should be indexed.
Troubleshooting
Multiple Atolio Jira apps are displayed on app management page
This likely means forge register step above is executed more than once. To fix it:
Open the developer console. It lists every app you have registered, along with each app’s ID.
Ask your Deployment Engineer which app your connector deployment is bound to.
Keep that app. For each of the others, uninstall it from your site:
forge uninstall --app-id-override <app-id>Use the app ID as shown in the developer console, not the full
ari:cloud:ecosystem::app/...value.Once an app has no installations left, delete it from the developer console.
2.5 - Box Connector
Index files, folders, comments, tasks, and web links in Box, along with the users and groups that control access to them.
The Box connector indexes files, folders, comments, tasks, and web links in Box, along with the users and groups that define who can access them.
Setup takes three steps:
- Create the Box app.
- Authorize it for your enterprise.
- Provide the connector its credentials.
Create the Box Application
Create a Custom App using Server Authentication (Client Credentials Grant) in the Box Developer Console (admin or co-admin account). In the app’s Configuration tab:
- App Access Level: App + Enterprise Access — required to enumerate and impersonate managed users and groups.
- Application Scopes: Read all files and folders stored in Box; Manage users; Manage groups; Manage enterprise properties.
- Advanced Features: Generate user access tokens; Make API calls using the as-user header.
Save changes.
Authorize the Application
A CCG app cannot call the API until an admin authorizes it: in the Box Admin Console → Apps → Custom Apps Manager, add/authorize the app by its Client ID and confirm the scopes. Until then the connection test fails with an authorization error.
Credentials
| Credential | Where to find it |
|---|---|
| Client ID | App Configuration → OAuth 2.0 Credentials |
| Client Secret | App Configuration → OAuth 2.0 Credentials (Fetch/Reveal) |
| Enterprise ID | Box Admin Console → Account & Billing → Account Info |
Provide Configuration
Only the three credentials are required; every other field has a safe default.
connector: box
instance: default
source: box
common:
  enabled: true
configuration:
  client_id:
    value: "<your-client-id>"
  client_secret:
    value: "<your-client-secret>"
  enterprise_id:
    value: "<your-enterprise-id>"
| Parameter | Type | Required | Default | Description |
|---|---|---|---|---|
client_id | secret | Yes | — | CCG application client ID. |
client_secret | secret | Yes | — | CCG application client secret. |
enterprise_id | secret | Yes | — | Box enterprise (account) ID the app is authorized for. |
base_url | string | No | https://api.box.com/2.0 | Overrides the Box API base URL. |
token_url | string | No | https://api.box.com/oauth2/token | Overrides the OAuth2 CCG token endpoint. |
per_user_rpm | integer | No | 500 | Requests-per-minute cap per impersonated user (0 = default). |
per_user_burst | integer | No | 5 | Per-user rate-limiter burst size (0 = default). |
page_size | integer | No | 100 | Page size for list calls (Box caps most endpoints at 1000). |
backfill_concurrency | integer | No | 10 | Async (one-per-user) workers used during backfill. |
reconcile_concurrency | integer | No | 10 | Async workers handling pollable, retriable reconciliation tasks. |
cache_size | integer | No | 100000 | Bounds the shared cache size for user->group, ACL and other mappings. |
cache_ttl_hours | integer | No | 48 | How long an entry stays valid in the ACL and root-owner caches before expiring and being re-resolved from the Box API. |
event_poll_interval_seconds | integer | No | 1800 | How often Stream() polls the Box admin event log. |
event_batch_size_max | integer | No | 1000 | Caps the number of events processed per Stream() poll window. |
stream_start_offset_seconds | integer | No | 3600 | How far back Stream() begins on first run, when no streaming checkpoint exists yet. |
event_processing_delay | integer | No | 300 | Holds each Stream() poll window back from “now” by this many seconds, giving the admin event log time to settle before it’s read. |
backfill_start_date | string | No | 1900-01-01 | Lower bound of the backfill window. Accepts an RFC3339 timestamp (2024-06-01T00:00:00Z) or a bare date (2024-06-01). |
backfill_end_date | string | No | Now | Upper bound of that same window. Same accepted formats; empty leaves the window open-ended. |
resources | map | No | {} | Per-resource include/exclude filters (see below). |
Note: Leave the rate-limit, concurrency, cache, and event-polling knobs at their defaults unless tuning throughput, memory, event latency, or responding to
429pressure.
Note: The backfill window only scopes what backfill emits — it does not limit
Stream(), which always processes new events as they arrive.
Filtering Indexed Resources
By default everything reachable is indexed. To narrow scope, map a resource key to an included (allowlist) and/or excluded (blocklist).
configuration:
  # ... credentials ...
  resources:
    user:
      excluded:
        - svc-indexer@example.com
    acl_group:
      included:
        - "engineering"
        - "admins"
Semantics: no filters → index all; included → only listed entries; excluded → all but listed entries; both → included minus excluded (exclude wins). Match values are compared for exact equality.
Match values are the native Box identifiers (not Atolio xIDs), since filtering happens during enumeration before any xID is assigned:
| Resource key | Match value |
|---|---|
user | The user’s Box login / email |
acl_group | The Box group Name |
Filters are enforced for the identity resources (user, acl_group), which are backfilled first because the rest of the connector’s ACLs depend on them.
Indexed Resources
| Resource | Display name | Description |
|---|---|---|
user | Box User | Enterprise users; resolve ACLs and content ownership. |
acl_group | Box Group | Managed groups and their members, used in ACLs. |
file | Box File | Files, including extracted text content. |
folder | Box Folder | Folders and their collaboration-derived ACLs. |
comment | Box Comment | Comments attached to files. |
task | Box Task | Tasks attached to files. |
web_link | Box Web Link | Bookmarks / web links stored in Box. |
2.6 - GitHub Connector
Index pull requests, commits, comments, and markdown in your GitHub repositories.
The GitHub connector enables the indexing of pull requests, commits, comments, and markdown in your GitHub repositories.
Create Access Token
To install the GitHub connector, use a GitHub account with admin access to the organization (requires read access to teams). Using this account, create a personal access token (currently Classic only) according to these instructions. You will need to ensure repo and user scopes are set (as shown below):
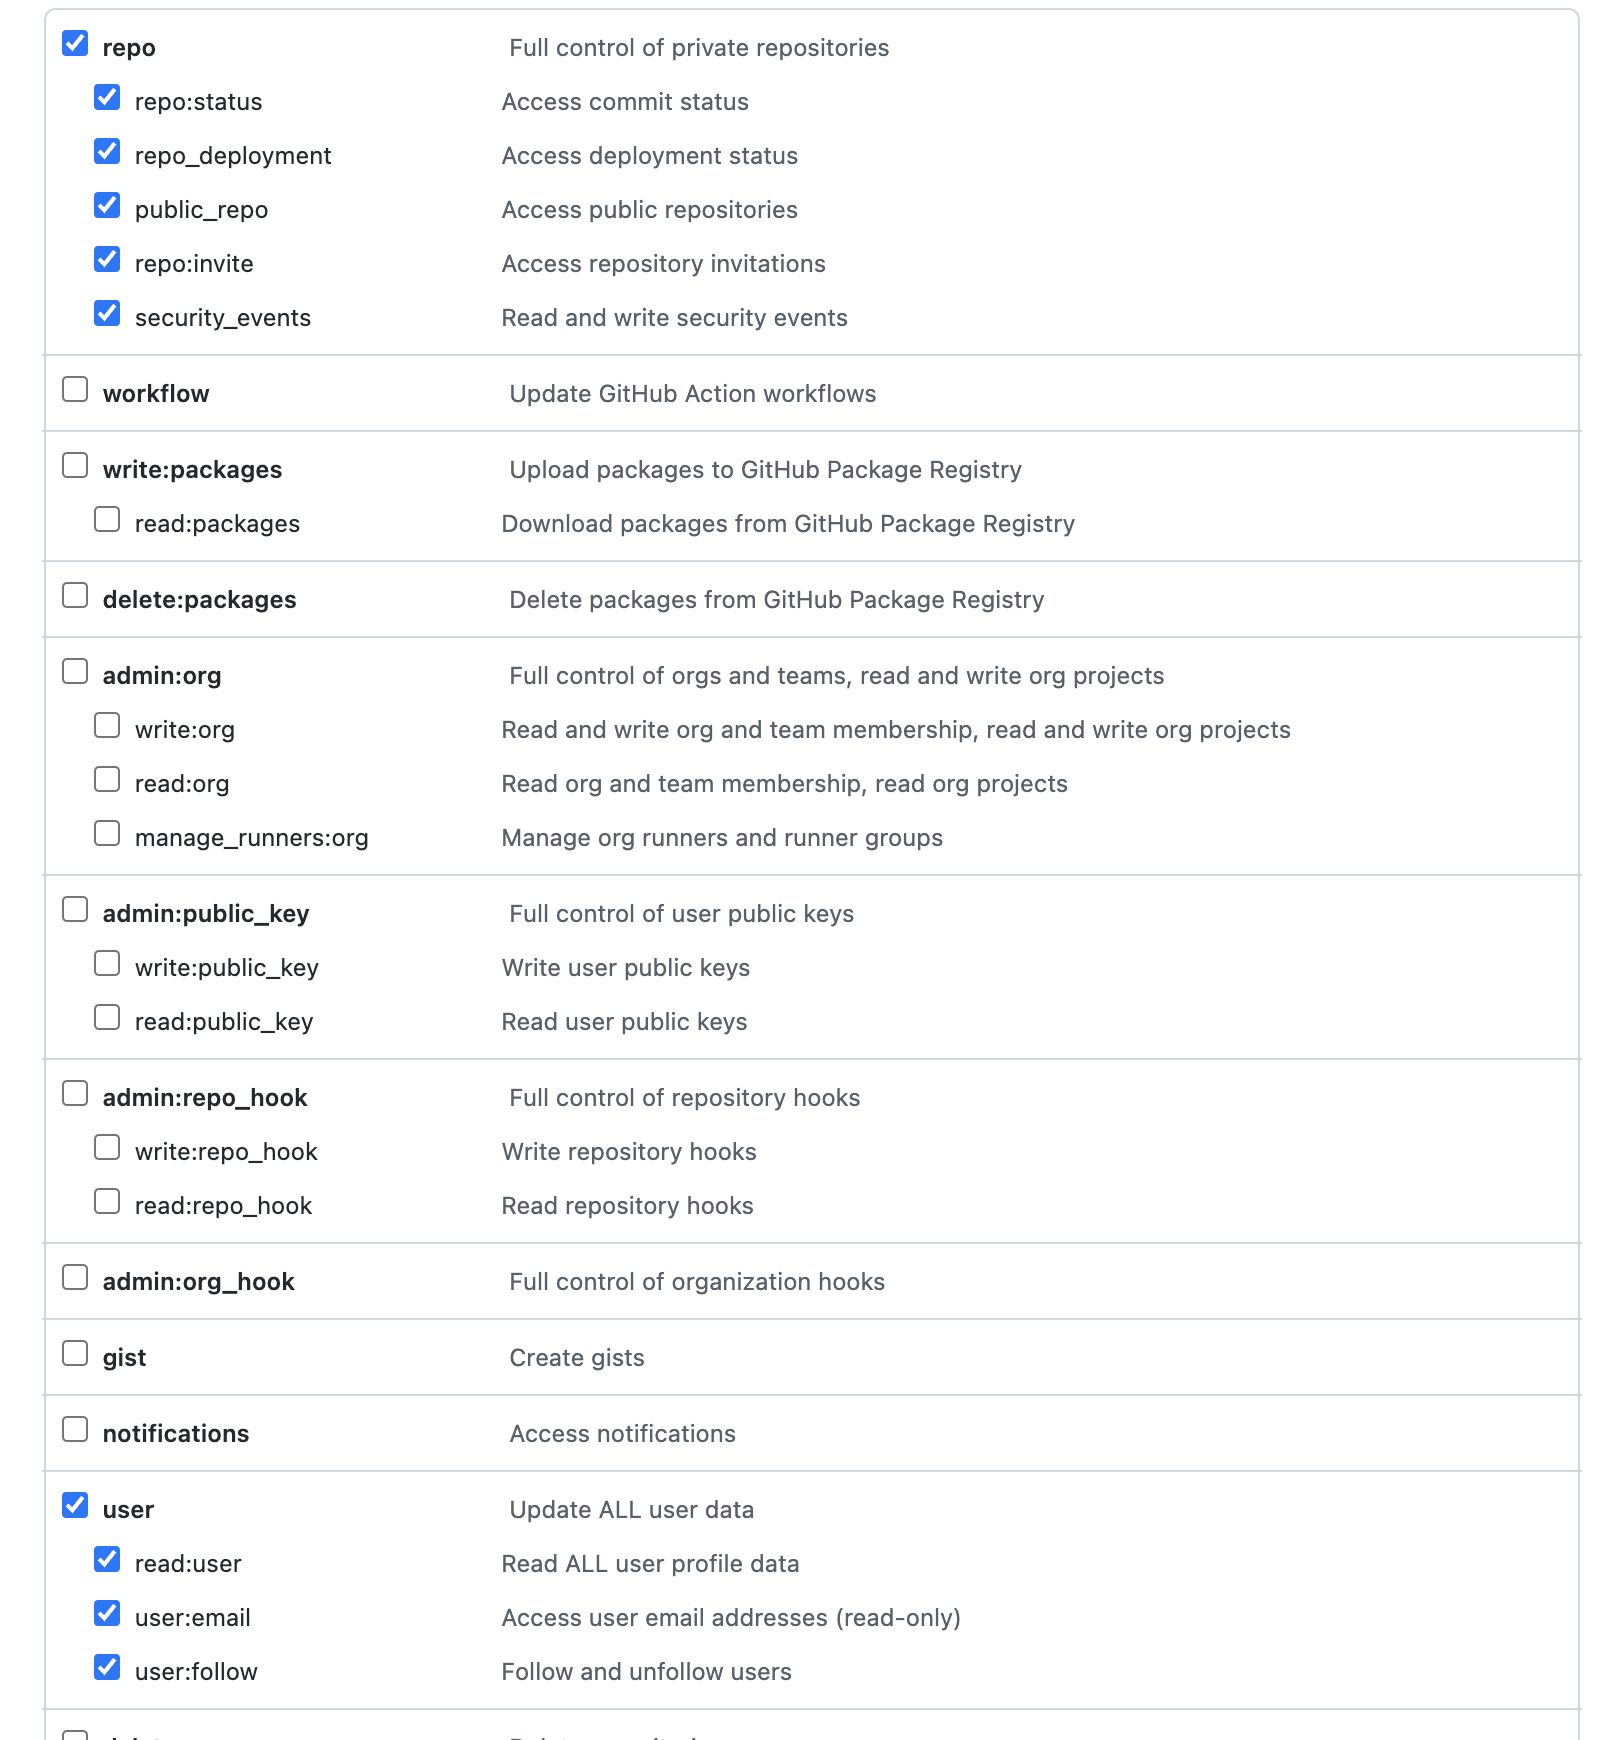
Note: for GitHub Enterprise Server installations, you would need to enable the site_admin scope too.
(Optional) Create GitHub App
Note: GitHub App flow does not work with GitHub Enterprise Server installations. You would need to use a personal access token like above
Instead of using a personal access token, a GitHub app can be created to install the GitHub connector. This provide better rate limits, especially if your org is on Enterprise Cloud. You can create a GitHub app according to these instructions.
You will need to ensure the following app permissions are set:
Repository Permissions:
| Permissions | Value |
|---|---|
| Administration | Read-only |
| Contents | Read-only |
| Issues | Read-only |
| Metadata | Read-only |
| Pull Requests | Read-only |
Organization Permissions:
| Permissions | Value |
|---|---|
| Administration | Read-only |
| Members | Read-only |
Setup Webhooks
If live indexing of GitHub content is desired, you will want to setup Webhooks. Go to Settings->Webhooks->Add Webhook. After authentication, you can now setup the webhook with the following configs:
| Config | Value |
|---|---|
| Payload URL | https://search.example.com/callback/github/ |
| Content type | application/json |
| Secret | Generated value (e.g. openssl rand -base64 32) |
| SSL verification | Enable SSL verification |
| Active | ✅ |
| Which events would you like to trigger this webhook? | Let me select individual events |
The following events are indexed at the repository level:
- Collaborator add, remove, or changed
- Commit comments
- Issues
- Issue comments
- Pull requests
- Pull requests reviews
- Pull requests reviews comments
- Pushes
- Repositories
The following events are indexed at the organization level:
- Team
Please manually check the boxes for each of the events above.
Warning: Setting up webhooks at the organization level will send webhook events for all repositories within the organization. If this is not desireable, please make changes to the configuration to only process and index specific repositories.
Provide Configuration
Provide these configuration values to your Deployment Engineer:
OrgNameshould be the identifier for your org (e.g.atolio)ApplicationIDis your GitHub app ID, can be found at your GitHub app settings page. This field only affects GitHub and GitHub Enterprise Cloud installations with no effects to GitHub Enterprise Server installationsInstallationIDis created on the first installation of the GitHub app on your org, can be found at the end of the URL for your installation:https://github.com/organizations/{ORG}/settings/installations/{INSTALLATION_ID}. This field only affects GitHub and GitHub Enterprise Cloud installations with no effects to GitHub Enterprise Server installationsSamlAuthenticationLevelis where you enabled SAML authentication, 2 options:enterpriseororgEnterpriseBaseURLis the hostname of your GitHub Enterprise Server instanceEnterpriseSlugis your GitHub Enterprise name
Note: If you have many GitHub repositories, it may be worth using the
includesorexcludesfeature in Atolio configuration to control the relevant repositories that should be indexed.
The GitHub connector provides two types of inclusion/exclusions in the resources field of the configuration as illustrated in the example below:
resources:
    repository:
        included:
            - lumen-infra
    file:
        included:
            - .md
The repository name lumen-infra in this example is the repo part in the repository’s URL (which has the following generic format: https://github.com/repos/{owner}/{repo}). The example above will only index the lumen-infra repository.
File filtering is done of the basis of file extension names (including the preceding dot .). The example above will configure the connector to index all markdown files. Note that by default file filtering is completely disabled as it is a relatively time consuming process.
Provide Secrets
Provide these secrets to your Deployment Engineer:
WebhookSecretis the webhook secret previously createdTokenis the personal access tokenAppPrivateKeyis the GitHub App private key in PEM format
(Optional) Configure GitHub user mappings
If employees have brought pre-existing GitHub accounts to their company’s GitHub organization, the identity resolver cannot automatically map them to company user identities. For this reason, the GitHub configuration contains a user mapping table. For example, the entries below map two GitHub user IDs to the user’s username (i.e. email address) in the organization:
12345678:  user1@example.com # "user1"
87654321:  user2@example.com # "user2"
The numerical GitHub ID can easily be obtained using the following: https://api.github.com/users/{USERNAME} in a browser where {USERNAME} is replaced with the GitHub username which can be found in the user’s profile (under the full name printed below the user’s avatar). The ID is in the id field of the JSON response. Adding an entry like this for every user will allow Atolio to link the GitHub user IDs to other sources.
2.7 - GitLab Connector
Index merge requests, commits, and comments in your GitLab projects.
The GitLab connector enables indexing of merge requests, commits, and comments across your GitLab projects. Atolio supports GitLab Server (minimum version v16.5-ee) and GitLab Cloud.
Create Access Token
As an admin, perform the following steps:
- Login as admin user
- Go to
https://gitlab.company.com/-/user_settings/personal_access_tokens - Click “Add New Token”
- Give it a name and expiration date, set scope as
read_api - Copy generated token
Setup Webhooks
If live indexing of GitLab content is desired, you will want to setup Webhooks. If you have GitLab Premium you can set up webhooks for groups. If you don’t have GitLab Premium, you need to set up a webhook for each project separately.
- Go to Settings/Webhooks
- Set URL to
https://relay.{search.company.com}/connectors/gitlab/{instance}/callback/gitlab - Set a strong “secret token”
- Check “Comments”, “Issue Events” and “Merge Request Events” under Triggers
- Keep “Enable SSL verification” checked
You also need to set up system hooks for the GitLab instance. This is done by an admin user and is required for getting live project updates.
- Go to Admin Area/System Hooks
- Set URL to the same as the webhook URL
- Set secret token as the same as the webhook secret token
- Keep “Enable SSL verification” checked
Provide Configuration
With the Access Token and Webhook Secret in hand, provide these configuration values to your Deployment Engineer:
BaseURLis left blank when using gitlab.com. For self-hosted installations specify the base URL for your instance, e.g.gitlab.example.comWebhookSecretis the webhook secret previously createdTokenis the personal access token
Note: If you have many GitLab projects, it may be worth using the
includesorexcludesfeature in Atolio configuration to control the relevant projects that should be indexed.
An example inclusion/exclusion configuration will look like the following:
resources:
  group:
    included:
      - examplegroup # Index "examplegroup" from GitLab
GitLab SaaS (gitlab.com) specific configuration
If you’re using the SaaS GitLab product hosted at gitlab.com instead of a self-hosted installation you’ll need to follow the above steps to provide an inclusion filter for at least one group you’d like to index. This is necessary to prevent the connector from attempting to index the entirety of the public SaaS GitLab deployment.
Configuring GitLab user mappings
If people are using their company emails in GitLab, the identity resolver cannot automatically map them to company user identities. For this reason the GitLab configuration contains a user mapping table. For example, the entries:
'12345678':  user1@example.com
'87654321':  user2@example.com
Map two GitLab user IDs to the user’s username (i.e. email address) in the organization. The numerical GitLab ID can easily be obtained using the following URL in a browser where USERNAME is replaced with the GitLab username. The ID is in the id field of the JSON response. On the command this can be obtained by using curl and jq as follows (using the user ID USERNAME in this example):
curl 'https://gitlab.company.com/api/v4/users?access_token=ACCESS_TOKEN&search=USERNAME' | jq '.[0].id'
Adding an entry like this for every user will allow Atolio to link the GitLab user IDs to other sources.
2.8 - Gong Connector
Index calls, transcripts, and trackers in Gong, along with the users and permission profiles that control access to them.
The Gong connector indexes calls, call transcripts, and keyword trackers in Gong, along with the users and permission profiles that define who can see each call.
Setup takes 2 steps:
- Create a Gong API key.
- Provide the connector its credentials and API base URL.
Create the API Key
Only a Gong user with the Tech admin role can manage API keys.
- In Gong, select Admin center from the left sidebar.
- On the Settings tab, under Ecosystem, select API.
- Select + Get API key.
- Enter a Key name, for example
Atolio. Optionally, set:- TTL (days): when the key expires. Leave it empty for a key that does not expire. An expired key stops the connector, so if you set one, plan to rotate the key before it lapses.
- Trusted IPs: the addresses allowed to use the key. If you set this, include the egress IP addresses of your Atolio deployment, or the connector’s requests are rejected.
- Copy the Access Key and Access Key Secret. Gong shows the secret only once, and it cannot be retrieved after you close the dialog.
The same page shows your tenant’s API base URL (for example https://us-12345.api.gong.io). The connector needs this value because each Gong tenant is served from its own regional host.
Note: The API page also offers Create Integration, for OAuth apps. The connector does not use OAuth; use + Get API key. If you do not see + Get API key, check that your Gong user has the Tech admin role.
Note: The connection test lists workspaces and fails if none are returned, or if a configured workspace is not found. If it fails with an authorization error, check that the access key is still active and that
base-urlmatches the host shown on the API page.
Credentials
| Credential | Where to find it |
|---|---|
| Access Key | Admin center → Settings → Ecosystem → API |
| Access Key Secret | Shown once, when the access key is created |
| API base URL | Admin center → Settings → Ecosystem → API |
| Workspace names (optional) | Admin center → Settings → Workspaces |
Provide Configuration
Only the two credentials and the base URL are required; every other field has a safe default.
connector: gong
instance: default
source: gong
common:
  enabled: true
  cron-spec: "*/30 * * * *"
configuration:
  access-key:
    value: "<your-access-key>"
  secret-access-key:
    value: "<your-access-key-secret>"
  base-url: "https://us-12345.api.gong.io"
| Parameter | Type | Required | Default | Description |
|---|---|---|---|---|
access-key | secret | Yes | — | Gong API access key. |
secret-access-key | secret | Yes | — | Gong API access key secret, paired with access-key. |
base-url | string | Yes | — | Your tenant’s Gong API base URL, e.g. https://us-12345.api.gong.io. |
workspaces | list | No | All workspaces | Workspace names to index (see below). |
processing-delay-mins | integer | No | 60 | How far behind “now” each run stops, giving Gong time to finish processing recent calls. |
lookback-mins | integer | No | 240 | How far before the last checkpoint each run starts, to catch calls that appear late or were edited. |
cache-ttl-hours | integer | No | 48 | How long the connector remembers indexed calls, so calls re-read in the lookback are skipped unless they changed. |
fill-from-days | integer | No | 1825 | How far back the first run indexes calls (default 5 years). |
fill-batch-size-hours | integer | No | 168 | Size of each checkpointed batch during a fill (default 7 days). |
priority-fill-every-n | integer | No | 1 | Re-index users and permission profiles every Nth run instead of every run. |
Unset or 0 values use the default. processing-delay-mins must be shorter than lookback-mins, and lookback-mins shorter than cache-ttl-hours.
Note: Leave the optional settings at their defaults unless you are tuning freshness or API usage.
Scheduling Syncs
Gong does not provide change events, so the connector runs as a scheduled backfill. Set common.cron-spec to control how often it runs, e.g. */30 * * * * to sync every 30 minutes. Without a cron-spec, the connector runs a single backfill at startup and does not pick up new calls afterwards.
The first run indexes calls from the last fill-from-days. Each later run picks up new calls, and re-indexes recent calls that changed in Gong. Transcripts are indexed together with their calls.
Limiting Workspaces
Gong workspaces separate teams or business units within one Gong tenant, and each has its own calls, trackers, and permission profiles. By default the connector indexes every workspace. To index only some of them, list their names under workspaces:
configuration:
  # ... credentials ...
  workspaces:
    - "North America"
    - "EMEA"
Names are matched case-insensitively; workspace IDs are also accepted. An unknown name stops the connector, and the error lists the available workspaces.
Note: The Gong connector does not currently support per-resource
included/excludedfilters. Useworkspacesto narrow scope.
Permissions
Atolio mirrors Gong’s call visibility rules:
- Private calls are visible only to the call’s owner and its internal participants.
- Other calls are visible to the owner and participants, plus anyone whose Gong permission profile grants access to them: all calls, their own calls, calls of their reports, or calls of their manager’s team.
Indexed Resources
| Resource | Display name | Description |
|---|---|---|
call | Gong Call | Calls, including participants, brief, key points, outline, highlights, topics, trackers, and linked CRM context. |
transcript | Gong Transcript | Speaker-attributed call transcripts; child of the call. |
tracker | Gong Tracker | Keyword trackers defined in each workspace. |
user | Gong User | Gong users; resolve ACLs, call participants, and transcript speakers. |
acl_group | Gong ACL Group | Groups derived from permission profiles and the reporting hierarchy, used in call and transcript ACLs. |
2.9 - Google Connectors
Index documents, sheets, slides, files, sites, email and chat across your Google Workspace (Google Drive, Gmail, Google Sites and Google Chat).
The Google connector enables the indexing of:
- Documents, Sheets, Slides, and other Files in Google Drive
- Email in Gmail
- Pages in Google Sites
- Spaces and messages in Google Chat
- Users and Groups as metadata in your Google Workspace to enable user mapping / permissions
Content and updates are streamed as changes are detected and processed in your Google Workspace.
Step 0: Create Terraform Service Account for Google
Note: Depending on installation being BYOK, Managed, or otherwise this step may be skipped. Consult with an Atolio Support Engineer for any clarification.
Terraform will need a service account to make changes to your GCP project. We will grant it permissions which will essentially allow it to create, read, and delete all project resources. As such, you should keep the credentials for this account safe and not reuse them. The Terraform scripts create a much more restricted service account for normal operation.
- Visit the IAM Service Accounts page https://console.cloud.google.com/iam-admin/serviceaccounts and select the project created previously to set up the Terraform service account.
- Click CREATE SERVICE ACCOUNT
- Choose a name. While it can be anything, the name “Atolio Terraform” is recommended.
- Select CREATE AND CONTINUE.
- Grant the following roles: “Owner”, “Security Center Admin”, “Project IAM Admin” (without conditions).
- Click DONE. Skip step 5, you will not need to grant other users access to this service account.
Now the service account is created we can create API keys:
- Navigate to https://console.cloud.google.com/iam-admin/serviceaccounts and select the project created previously.
- Click the service user that was created in the previous step.
- Select the KEYS tab click the ADD KEY pull-down menu
- Select Create new key and use JSON for key type. Click CREATE.
This will create another JSON file with the API key and related information. This file will be needed by your Deployment Engineer (in their deploy/terraform directory).
In order for Terraform to programmatically make modifications, you need to manually enable the Google Cloud Resource Manager API.
- Navigate to https://console.cloud.google.com/apis/library
- Search for “Cloud Resource Manager API”
- Select “Cloud Resource Manager API”. Click ENABLE.
The project will use additional APIs, but now that this API is available to Terraform, the Atolio deployment scripts will use Terraform to enable those APIs automatically.
Step 1: Grant Service Account Permissions
The Google Workspace domain needs to grant permission to the integration’s default service account to perform operations. Unfortunately Terraform can’t automate this, so it has to be performed manually.
Your Deployment Engineer will need to make note of the unique ID for the default App Engine service account and the list of scopes. Be aware that this ID is of the default service account, typically named App Engine default service account. It is not the Service Account you’ve previously created.
And the list of scopes are:
https://www.googleapis.com/auth/gmail.readonly,https://www.googleapis.com/auth/calendar.readonly,https://www.googleapis.com/auth/calendar.acls.readonly,https://www.googleapis.com/auth/admin.directory.user.readonly,https://www.googleapis.com/auth/admin.directory.group.readonly,https://www.googleapis.com/auth/admin.directory.domain.readonly,https://www.googleapis.com/auth/drive.readonly,https://www.googleapis.com/auth/drive.activity.readonly,https://www.googleapis.com/auth/chat.spaces.readonly,https://www.googleapis.com/auth/chat.messages.readonly,https://www.googleapis.com/auth/chat.memberships.readonly,https://www.googleapis.com/auth/ediscovery,https://www.googleapis.com/auth/devstorage.read_only
Grant every scope in that list. Each source requests only the scopes it needs, in its own token exchange, and Google refuses that exchange outright when the grant is missing any one of them — so a gap takes down every source sharing the exchange, not only the feature the scope belongs to. Gmail asks for calendar.readonly and calendar.acls.readonly alongside gmail.readonly, for example, so an ungranted calendar scope stops mail indexing too.
The scopes cover all five Google sources: mail and calendar, Drive, Chat, Sites, and the directory. Granting the full list keeps a later source from failing when you enable it.
We now need to set up Domain-wide Delegation:
- Navigate to the Google Admin console: https://admin.google.com/ac/owl. An account with admin access is required.
- Scroll down and click “MANAGE DOMAIN WIDE DELEGATION”.
- Click Add new and enter your service account client ID (obtained from your Deployment Engineer in the previous step). No overwrite.
- Enter the value for
google_service_account_idas obtained from your Deployment Engineer. - Enter the list of scopes as listed above (as a single comma-delimited string).
- Click AUTHORIZE.
Now Atolio is authorized to retrieve Google Workspace data.
Step 2: Deploy the Connector
Before the source can be configured, the connector pod must be running in the cluster. Connectors are deployed by enabling them in values-lumen.yaml. See Deploying Connectors for the full details, including how instances work.
connectors:
  google:
    default:
      enabled: true
default is the instance identifier. Treat it as immutable once set, because the instance is part of every resource identifier the connector ingests. Apply the change by upgrading the lumen Helm chart with create-infra.sh (recommended) or helm upgrade as described in the sources overview.
Step 3: Configure the Source
Source configuration is applied with atolioctl using a YAML file. If you have not already installed atolioctl, follow Configuring Sources first. The commands below also need an API token in JWT_TOKEN and the address the feeder server’s gRPC endpoint, both described next.
atolioctl Prerequisites
JWT_TOKEN holds the API token atolioctl uses to authenticate to the feeder. Generate one from the deployment’s Helm values directory, which holds the values-lumen.yaml and values-lumen-templated.yaml files produced by create-infra.sh. The token is signed with the deployment’s jwtSecretKey, and the atolio:*:*:* match pattern grants access across all connectors, instances, and resources:
export JWT_TOKEN=$(atolioctl connector create-jwt --raw --config-dir . "atolio:*:*:*")
--feeder-address is the gRPC address of the feeder server that is used to read and write source configuration through. The standard path is to port-forward the in-cluster service/feeder and point atolioctl at it on localhost:
# Run K8s port forward to feeder as background to re-use same shell
kubectl port-forward -n atolio-svc service/feeder 8889 &
With that port-forward running in current terminal or another, the examples below use --feeder-address :8889. The empty host means localhost, and because the port is not 443 the connection is made in plaintext, which is what the port-forward exposes. If the feeder is instead published on a load balancer, pass that address with port 443, for example --feeder-address feed.search.example.com:443, which connects over TLS.
Edit and Apply the Configuration
Source configuration is stored as a single document that covers every configured connector. The supported workflow is to export the current configuration, edit it, then import it back. Always start from a fresh export so you do not overwrite a change made elsewhere.
Export the current configuration to a local file:
atolioctl configure export --jwt-token-sdk ${JWT_TOKEN} --feeder-address :8889 lumen-connectors.yaml
Add a Google entry alongside the connectors already in the file, substituting the values you collected in Step 1:
connectors:
  # ...existing connectors left in place...
  google:
    default:
      google:
        connector: google
        instance: default
        source: google
        common:
          enabled: true
          identity-provider: true      # This connector is the identity provider
          cron-spec: 0 7 * * *         # Re-sync users on this schedule
        secrets:
          service_account_key:
            value: "<GOOGLE_SERVICE_ACCOUNT_B64>"
        configuration:
          parallelism: 0
          project-id: "<GOOGLE_PROJECT_ID>"
          service-user: "<GOOGLE_SERVICE_USER>"
Exported entries also carry a rendezvous-completed flag and a status block reporting each source’s current state and last validation result. Those fields are managed by Atolio. Leave them untouched on existing entries, and omit them when adding a new entry by hand as shown above.
Import the edited file to write the configuration back into the stack:
atolioctl configure import lumen-connectors.yaml --jwt-token-sdk ${JWT_TOKEN} --feeder-address :8889
Import writes the configuration into the stack after checking that the YAML is well formed. It does not contact Google. The connector validates the credentials and connection itself when it starts and picks up the configuration, and it reads users after that. If something is wrong, the source reports as misconfigured and the connector pod logs the error. See Troubleshooting for the specific messages.
Target Audiences
A target audience is a group of people your Workspace administrator defines so that content can be shared with them without naming each person. Google Drive and Google Chat can grant access this way.
Map each audience id to the groups and users it grants access to:
        configuration:
          audiences:
            00zu0gcz154hwnv: # target audience id
              - engineering@example.com
              - all-contractors@example.com
              - jane.doe@example.com
Each entry is a group address or an individual’s address.
Finding target audiences
In the Google Admin console, go to Directory > Target audiences and select the audience. Its id is the last segment of the page’s address:
https://admin.google.com/ac/targetaudiences/00zu0gcz154hwnv
                                            ^^^^^^^^^^^^^^^
The same page lists the groups and individuals the audience contains, which are the values to put under the id.
This section applies only if your organization shares content with target audiences. If it does not, you can omit audiences entirely.
Configuration Schema
In the exported file, every source lives at connectors.<connector>.<instance>.<source>, so the Google source sits at connectors.google.default.google.
GoogleSourceConfiguration
Google Workspace connector configuration.
| Field | Type | Required | Default | Description |
|---|---|---|---|---|
connector | string | yes | N/A | Parent connector to reference (can be self) |
instance | string | yes | N/A | Multi-state config variable used for certain connectors, often default |
source | string | yes | N/A | Sub-connector reference (can be self), often object key |
common | Common | yes | N/A | Common connector settings. |
secrets | Secrets | yes | N/A | Secret credentials for authentication. |
configuration | Configuration | yes | N/A | Connector-specific configuration. |
Common
Common settings shared across all connectors.
| Field | Type | Required | Default | Description |
|---|---|---|---|---|
enabled | boolean | yes | N/A | Set to true to run the source. |
identity-provider | boolean | yes | N/A | Set to true so Atolio uses this connector to resolve logins to users. |
cron-spec | string | no | N/A | Cron expression for periodic re-sync of users (e.g., 0 7 * * *). Omit to sync only on demand. |
Secrets
Sensitive configuration values for authentication.
| Field | Type | Required | Default | Description |
|---|---|---|---|---|
service_account_key | SecretValue | yes | N/A | Google service account key in Base64 to authenticate to Google Workspace. |
SecretValue
A reference to a secret value.
| Field | Type | Required | Default | Description |
|---|---|---|---|---|
value | string | yes | N/A | The secret value (typically Base64-encoded). |
Configuration
Google Workspace connector-specific configuration.
| Field | Type | Required | Default | Description |
|---|---|---|---|---|
domains | string | no | "" | Comma-separated list of allowed customer domains. If empty, all domains are considered. |
project-id | string | yes | N/A | GCP project ID under which the integration is operating. |
service-user | string | yes | N/A | Email address of an administrator within the Google Workspace account. |
parallelism | integer | yes | 0 | Number of users to process in parallel. Set to 0 for automatic parallelism based on system resources. |
audiences | map[string][]string | no | {} | Target audiences and the group and user addresses each one grants access to, keyed by audience id. See Target Audiences. |
2.9.1 - Gmail Connector Setup
Provide necessary API permissions to index Gmail content.
Installing the Gmail Connector
Note: For this step, your deployment engineer will be required.
The Gmail and Google Drive connectors depend on a shared Google Workspace configuration section. Google Workspace requires three properties to be set during configuration:
ProjectIDmust reference the project created in GCP. The id, not the name, must be specified.ServiceUseris currently a reference to a super user or administrator within your organization. For example, the primary IT email. This may change in the future.ServiceAccountKeyis the base64-encoded string as obtained during initial install of the Google source.
To obtain the service account key, your deployment engineer will run the following Terraform command:
terraform output -raw google_connector_service_account_key
And optionally:
Domainsis a comma-delimited list of domains applicable to this deployment.Parallelismis an optimization to increase the concurrency with respect to indexing Google data. Default is 32, so if set, should be higher than this value.
Once the Google source is configured, the Google Drive and Gmail sources can be configured with the same values.
Configuration
Source configuration can be applied in two ways:
Recommended (v4.24+): Use the Admin console to configure this source through the browser. You can paste the YAML configuration shown below directly into the Admin console.
Alternative: Use atolioctl via the command line (for Deployment Engineers). If using atolioctl, follow Configuring Sources first. The commands below also need an API token in JWT_TOKEN and the address the feeder server’s gRPC endpoint, both described next.
Edit and Apply the Configuration
Source configuration is stored as a single document that covers every configured connector. The supported workflow is to export the current configuration, edit it, then import it back. Always start from a fresh export so you do not overwrite a change made elsewhere.
Export the current configuration to a local file:
atolioctl configure export --jwt-token-sdk ${JWT_TOKEN} --feeder-address :8889 lumen-connectors.yaml
Add a Google entry alongside the connectors already in the file, substituting the values you collected in Step 1:
connectors:
  # ...existing connectors left in place...
  google:
    default:
      # ...existing Google sub-connectors left in place...
      gdrive:
        connector: google              # Reference to parent connector, usually Google
        instance: default
        source: gmail
        common:
          enabled: true
          identity-provider: false     # This connector is a workspace tool, not IDP
        secrets:
          service_account_key:
            value: "<GOOGLE_SERVICE_ACCOUNT_B64>"
        configuration:
          parallelism: 0
          drive-contrib-hydration-method: activity
          project-id: "<GOOGLE_PROJECT_ID>"
          service-user: "<GOOGLE_SERVICE_USER>"
Exported entries also carry a rendezvous-completed flag and a status block reporting each source’s current state and last validation result. Those fields are managed by Atolio. Leave them untouched on existing entries, and omit them when adding a new entry by hand as shown above.
Import the edited file to write the configuration back into the stack:
atolioctl configure import lumen-connectors.yaml --jwt-token-sdk ${JWT_TOKEN} --feeder-address :8889
Import writes the configuration into the stack after checking that the YAML is well formed. It does not contact Google. The connector validates the credentials and connection itself when it starts and picks up the configuration, and it reads users after that. If something is wrong, the source reports as misconfigured and the connector pod logs the error. See Troubleshooting for the specific messages.
Configuration Schema
In the exported file, every source lives at connectors.<connector>.<instance>.<source>, so the Gmail source sits at connectors.google.default.gmail.
GmailSourceConfiguration
Gmail connector configuration.
| Field | Type | Required | Default | Description |
|---|---|---|---|---|
connector | string | yes | N/A | Parent connector to reference (can be self) |
instance | string | yes | N/A | Multi-state config variable used for certain connectors, often default |
source | string | yes | N/A | Sub-connector reference (can be self), often object key |
common | Common | yes | N/A | Common connector settings. |
secrets | Secrets | yes | N/A | Secret credentials for authentication. |
configuration | GmailConfiguration | yes | N/A | Gmail-specific configuration. |
Common
Common settings shared across all connectors.
| Field | Type | Required | Default | Description |
|---|---|---|---|---|
enabled | boolean | yes | N/A | Set to true to run the source. |
identity-provider | boolean | yes | N/A | Set to true so Atolio uses this connector to resolve logins to users. |
cron-spec | string | no | N/A | Cron expression for periodic re-sync of users (e.g., 0 7 * * *). Omit to sync only on demand. |
Secrets
Sensitive configuration values for authentication.
| Field | Type | Required | Default | Description |
|---|---|---|---|---|
service_account_key | SecretValue | yes | N/A | Google service account key in Base64 to authenticate to Google Workspace. |
SecretValue
A reference to a secret value.
| Field | Type | Required | Default | Description |
|---|---|---|---|---|
value | string | yes | N/A | The secret value (typically Base64-encoded). |
GmailConfiguration
Gmail-specific connector configuration.
| Field | Type | Required | Default | Description |
|---|---|---|---|---|
domains | string | no | "" | Comma-separated list of allowed customer domains. If empty, all domains are considered. |
project-id | string | yes | N/A | GCP project ID under which the integration is operating. |
service-user | string | yes | N/A | Email address of an administrator within the Google Workspace account. |
parallelism | integer | yes | 0 | Number of mailboxes to process in parallel. Set to 0 for automatic parallelism based on system resources. |
drive-contrib-hydration-method | string | no | null | Override method to populate contributor files. Can be "permission", "revision", or "activity". |
2.9.2 - Google Chat Connector Setup
Provide necessary API permissions to index Google Chat spaces and messages.
Installing the Google Chat Connector
Note: For this step, your deployment engineer will be required.
The Google Chat connector depends on the same Google Workspace configuration section as the Gmail and Google Drive connectors, so ProjectID, ServiceUser, and ServiceAccountKey carry the same values described in the Google connector setup.
Prerequisites
Enable the Required APIs
The GCP project referenced by project-id must have these APIs enabled:
- Google Chat API (
chat.googleapis.com) - Google Workspace Events API (
workspaceevents.googleapis.com) - Cloud Pub/Sub API (
pubsub.googleapis.com)
The Atolio Terraform module enables them for you. If the project is managed by hand, enable them from the API Library.
Configure the Chat App
Google requires every project that calls Chat API to have a Chat app configured, manually by an admin.
Open the Google Chat API configuration page and complete the form:
| Field | Value |
|---|---|
| Build this Chat app as a Google Workspace add-on | Leave checked, which is the default |
| App name | Atolio |
| Avatar URL | https://docs.atolio.com/img/atolio-logo-192x192.png, or any publicly reachable square image such as your own company logo |
| Description | Atolio Google Chat Connector |
| Enable interactive features | Leave off |
Leave the remaining fields at their defaults and save.
Grant the Chat Scopes
You will need a Service Account as described in Grant Service Account Permissions. In addition to the scopes listed there, the domain-wide delegation entry must carry the following scopes:
https://www.googleapis.com/auth/chat.spaces.readonly
https://www.googleapis.com/auth/chat.messages.readonly
https://www.googleapis.com/auth/chat.memberships.readonly
| Scope | Used for |
|---|---|
chat.spaces.readonly | Listing and reading the spaces each user belongs to |
chat.messages.readonly | Reading messages, and subscribing to message events |
chat.memberships.readonly | Reading space membership, and subscribing to membership events |
To add them, open the Google Admin console at https://admin.google.com/ac/owl/domainwidedelegation, edit the existing entry for the Atolio service account client ID, append the three scopes to the list already there, and authorize. Removing a scope that is already in the list will break the Gmail, Drive, or Sites sources.
Create the Pub/Sub Topic and Subscription
To support the indexing of Google Chat messages in real-time (streaming), a Pub/Sub topic is needed.
| Resource | Name | Requirement |
|---|---|---|
| Topic | GChatEvents | Grant roles/pubsub.publisher to chat-api-push@system.gserviceaccount.com, the service account Google publishes Chat events as |
| Subscription | GChatEvents | A pull subscription on that topic. Grant roles/pubsub.subscriber to the Atolio connector service account |
The Atolio Terraform module creates both, along with the two role bindings. If you are provisioning by hand, make sure to keep the name and bindings as listed above.
Streaming is the only part of the connector that needs Pub/Sub. If you set skip-streaming to true, the topic and subscription are not required, and the connector indexes only what it finds on each backfill.
Configuration
Source configuration can be applied in two ways:
Recommended (v4.24+): Use the Admin console to configure this source through the browser. You can paste the YAML configuration shown below directly into the Admin console.
Alternative: Use atolioctl via the command line (for Deployment Engineers). If using atolioctl, follow Configuring Sources first. The commands below also need an API token in JWT_TOKEN and the address of the feeder server’s gRPC endpoint.
Edit and Apply the Configuration
Source configuration is stored as a single document that covers every configured connector. The supported workflow is to export the current configuration, edit it, then import it back. Always start from a fresh export so you do not overwrite a change made elsewhere.
Export the current configuration to a local file:
atolioctl configure export --jwt-token-sdk ${JWT_TOKEN} --feeder-address :8889 lumen-connectors.yaml
Add a Google Chat entry alongside the Google sub-connectors already in the file, using the same values you provided for the Google source:
connectors:
  # ...existing connectors left in place...
  google:
    default:
      # ...existing Google sub-connectors left in place...
      gchat:
        connector: google              # Reference to parent connector, usually Google
        instance: default
        source: gchat
        common:
          enabled: true
          identity-provider: false     # This connector is a workspace tool, not IDP
        secrets:
          service_account_key:
            value: "<GOOGLE_SERVICE_ACCOUNT_B64>"
        configuration:
          parallelism: 0
          project-id: "<GOOGLE_PROJECT_ID>"
          service-user: "<GOOGLE_SERVICE_USER>"
Exported entries also carry a rendezvous-completed flag and a status block reporting each source’s current state and last validation result. Those fields are managed by Atolio. Leave them untouched on existing entries, and omit them when adding a new entry by hand as shown above.
Import the edited file to write the configuration back into the stack:
atolioctl configure import lumen-connectors.yaml --jwt-token-sdk ${JWT_TOKEN} --feeder-address :8889
Import writes the configuration into the stack after checking that the YAML is well formed. It does not contact Google. The connector validates the credentials and connection itself when it starts and picks up the configuration. If something is wrong, the source reports as misconfigured and the connector pod logs the error. See Troubleshooting for the specific messages.
Limiting the Backfill Window
By default, backfill reads messages created in the last five years. Narrow that with backfill-start-time, which is useful on a large Workspace where the first pass would otherwise run for a long time against Chat’s per-project read quota:
        configuration:
          backfill-start-time: "2026-01-01T00:00:00Z"
Both bounds are RFC 3339 timestamps. backfill-end-time is unbounded when unset, and is mostly useful for pinning a reproducible window.
Backfill resumes from where it left off. Each space records the point its messages were read up to, so an interrupted or repeated pass reads only what is new rather than starting over.
Discoverable Spaces and Target Audiences
A Google Chat space can be made discoverable to a target audience, which is a group of people your Workspace administrator defines. Anyone in that audience can find the space and read its messages without being a member, and Atolio has to reflect that in its permissions.
See Target Audiences to configure target audiences in Google IdP connector.
Configuration Schema
In the exported file, every source lives at connectors.<connector>.<instance>.<source>, so the Google Chat source sits at connectors.google.default.gchat.
GoogleChatSourceConfiguration
Google Chat connector configuration.
| Field | Type | Required | Default | Description |
|---|---|---|---|---|
connector | string | yes | N/A | Parent connector to reference (can be self) |
instance | string | yes | N/A | Multi-state config variable used for certain connectors, often default |
source | string | yes | N/A | Sub-connector reference (can be self), often object key |
common | Common | yes | N/A | Common connector settings. |
secrets | Secrets | yes | N/A | Secret credentials for authentication. |
configuration | GChatConfiguration | yes | N/A | Google Chat-specific configuration. |
Common
Common settings shared across all connectors.
| Field | Type | Required | Default | Description |
|---|---|---|---|---|
enabled | boolean | yes | N/A | Set to true to run the source. |
identity-provider | boolean | yes | N/A | Set to true so Atolio uses this connector to resolve logins to users. Leave false for Google Chat; the Google source is the identity provider. |
cron-spec | string | no | N/A | Cron expression for periodic re-sync (e.g., 0 7 * * *). Omit to sync only on demand. |
Secrets
Sensitive configuration values for authentication.
| Field | Type | Required | Default | Description |
|---|---|---|---|---|
service_account_key | SecretValue | yes | N/A | Google service account key in Base64 to authenticate to Google Workspace. |
SecretValue
A reference to a secret value.
| Field | Type | Required | Default | Description |
|---|---|---|---|---|
value | string | yes | N/A | The secret value (typically Base64-encoded). |
GChatConfiguration
Google Chat-specific connector configuration.
| Field | Type | Required | Default | Description |
|---|---|---|---|---|
project-id | string | yes | N/A | GCP project ID under which the integration is operating. The GChatEvents topic and subscription are looked up here. |
service-user | string | yes | N/A | Email address of an administrator within the Google Workspace account. |
domains | string | no | "" | Comma-separated list of allowed customer domains. If empty, all domains are considered. |
parallelism | integer | no | 32 | Number of users walked in parallel during backfill. Set to 0 to use the default. |
skip-backfill | boolean | no | false | Set to true to go straight to streaming without reading message history. |
skip-streaming | boolean | no | false | Set to true to disable real-time event listening. Pub/Sub is not used when this is set. |
backfill-start-time | string | no | 5 years ago | Lower bound of the backfill window, as an RFC 3339 timestamp. |
backfill-end-time | string | no | unbounded | Upper bound of the backfill window, as an RFC 3339 timestamp. |
2.9.3 - Google Drive Connector Setup
Provide necessary API permissions to index Google Drive contents.
Installing the Google Drive Connector
Note: For this step, your deployment engineer will be required.
The Gmail and Google Drive connectors depend on a shared Google Workspace configuration section. Google Workspace requires three properties to be set during configuration:
ProjectIDmust reference the project created in GCP. The id, not the name, must be specified.ServiceUseris currently a reference to a super user or administrator within your organization. For example, the primary IT email. This may change in the future.ServiceAccountKeyis the base64-encoded string as obtained during initial install of the Google source.
To obtain the service account key, your deployment engineer will run the following Terraform command:
terraform output -raw google_connector_service_account_key
And optionally:
Domainsis a comma-delimited list of domains applicable to this deployment.Parallelismis an optimization to increase the concurrency with respect to indexing Google data. Default is 32, so if set, should be higher than this value.
Once the Google source is configured, the Google Drive and Gmail sources can be configured with the same values.
Configuration
Source configuration can be applied in two ways:
Recommended (v4.24+): Use the Admin console to configure this source through the browser. You can paste the YAML configuration shown below directly into the Admin console.
Alternative: Use atolioctl via the command line (for Deployment Engineers). If using atolioctl, follow Configuring Sources first. The commands below also need an API token in JWT_TOKEN and the address the feeder server’s gRPC endpoint, both described next.
Edit and Apply the Configuration
Source configuration is stored as a single document that covers every configured connector. The supported workflow is to export the current configuration, edit it, then import it back. Always start from a fresh export so you do not overwrite a change made elsewhere.
Export the current configuration to a local file:
atolioctl configure export --jwt-token-sdk ${JWT_TOKEN} --feeder-address :8889 lumen-connectors.yaml
Add a Google entry alongside the connectors already in the file, substituting the values you collected in Step 1:
connectors:
  # ...existing connectors left in place...
  google:
    default:
      # ...existing Google sub-connectors left in place...
      gdrive:
        connector: google              # Reference to parent connector, usually Google
        instance: default
        source: gdrive
        common:
          enabled: true
          identity-provider: false     # This connector is a workspace tool, not IDP
        secrets:
          service_account_key:
            value: "<GOOGLE_SERVICE_ACCOUNT_B64>"
        configuration:
          parallelism: 0
          drive-contrib-hydration-method: activity
          project-id: "<GOOGLE_PROJECT_ID>"
          service-user: "<GOOGLE_SERVICE_USER>"
Exported entries also carry a rendezvous-completed flag and a status block reporting each source’s current state and last validation result. Those fields are managed by Atolio. Leave them untouched on existing entries, and omit them when adding a new entry by hand as shown above.
Import the edited file to write the configuration back into the stack:
atolioctl configure import lumen-connectors.yaml --jwt-token-sdk ${JWT_TOKEN} --feeder-address :8889
Import writes the configuration into the stack after checking that the YAML is well formed. It does not contact Google. The connector validates the credentials and connection itself when it starts and picks up the configuration, and it reads users after that. If something is wrong, the source reports as misconfigured and the connector pod logs the error. See Troubleshooting for the specific messages.
Sharing a file with Target Audiences
A Google Drive file can be shared with a target audience, which is a group of people your Workspace administrator defines. Anyone in that audience can access the original file.
See Target Audiences to configure target audiences in Google IdP connector.
Document Permissions
Atolio mirrors each file’s Drive sharing settings when deciding who can find it in search. Drive’s “Can find in search results” toggle (shown when you share to your whole domain) is respected: a file that is not discoverable in Drive is not discoverable in Atolio.
| Drive sharing setting | Who can find the file in Atolio |
|---|---|
| Shared with specific people or groups | Those users and groups |
Anyone at <domain> — “Can find in search results” on | Everyone in that domain |
Anyone at <domain> with the link — “Can find in search results” off | Only people the file is also shared with directly |
| Anyone with the link (public) | Only people the file is also shared with directly |
A file whose only sharing setting is link-based has no directly shared users or groups, so it is indexed but returned to no one. Share it with specific people, or turn on “Can find in search results”, to make it discoverable.
Configuration Schema
In the exported file, every source lives at connectors.<connector>.<instance>.<source>, so the Google Drive source sits at connectors.google.default.gdrive.
GoogleDriveSourceConfiguration
Google Drive connector configuration.
| Field | Type | Required | Default | Description |
|---|---|---|---|---|
connector | string | yes | N/A | Parent connector to reference (can be self) |
instance | string | yes | N/A | Multi-state config variable used for certain connectors, often default |
source | string | yes | N/A | Sub-connector reference (can be self), often object key |
common | Common | yes | N/A | Common connector settings. |
secrets | Secrets | yes | N/A | Secret credentials for authentication. |
configuration | GDriveConfiguration | yes | N/A | Google Drive-specific configuration. |
Common
Common settings shared across all connectors.
| Field | Type | Required | Default | Description |
|---|---|---|---|---|
enabled | boolean | yes | N/A | Set to true to run the source. |
identity-provider | boolean | yes | N/A | Set to true so Atolio uses this connector to resolve logins to users. |
cron-spec | string | no | N/A | Cron expression for periodic re-sync of users (e.g., 0 7 * * *). Omit to sync only on demand. |
Secrets
Sensitive configuration values for authentication.
| Field | Type | Required | Default | Description |
|---|---|---|---|---|
service_account_key | SecretValue | yes | N/A | Google service account key in Base64 to authenticate to Google Workspace. |
SecretValue
A reference to a secret value.
| Field | Type | Required | Default | Description |
|---|---|---|---|---|
value | string | yes | N/A | The secret value (typically Base64-encoded). |
GDriveConfiguration
Google Drive-specific connector configuration.
| Field | Type | Required | Default | Description |
|---|---|---|---|---|
domains | string | no | "" | Comma-separated list of allowed customer domains. If empty, all domains are considered. |
project-id | string | yes | N/A | GCP project ID under which the integration is operating. |
service-user | string | yes | N/A | Email address of an administrator within the Google Workspace account. |
parallelism | integer | yes | 0 | Number of files to process in parallel. Set to 0 for automatic parallelism based on system resources. |
drive-contrib-hydration-method | string | no | null | Override method to populate contributor files. Can be "permission", "revision", or "activity". |
2.9.4 - Google Sites Connector Setup
Provide necessary API permissions to index Google Sites.
Installing the Google Sites Connector
Note: For this step, your deployment engineer will be required.
Prerequisites
Google Sites Connector requires you to enable Google Vault for your organization. Google Vault enrollment details are available in the official documentation
You will need a Service Account as described in Grant Service Account Permissions section. In addition to the scopes listed there, you must grant the following scopes to the Service Account:
- https://www.googleapis.com/auth/ediscovery
- https://www.googleapis.com/auth/devstorage.read_only
Vault API access must be manually enabled by the GCP project associated with the Service Account. This can be done via GCP API Console, by following the steps in the official documentation.
Configuration
Source configuration can be applied in two ways:
Recommended (v4.24+): Use the Admin console to configure this source through the browser. You can paste the YAML configuration shown below directly into the Admin console.
Alternative: Use atolioctl via the command line (for Deployment Engineers). If using atolioctl, follow Configuring Sources first. The commands below also need an API token in JWT_TOKEN and the address the feeder server’s gRPC endpoint, both described next.
Edit and Apply the Configuration
Source configuration is stored as a single document that covers every configured connector. The supported workflow is to export the current configuration, edit it, then import it back. Always start from a fresh export so you do not overwrite a change made elsewhere.
Export the current configuration to a local file:
atolioctl configure export --jwt-token-sdk ${JWT_TOKEN} --feeder-address :8889 lumen-connectors.yaml
Add a Google entry alongside the connectors already in the file, substituting the values you collected in Step 1:
connectors:
  # ...existing connectors left in place...
  google:
    default:
      # ...existing Google sub-connectors left in place...
      gsites:
        connector: google              # Reference to parent connector, usually Google
        instance: default
        source: gsites
        common:
          enabled: true
          identity-provider: false     # This connector is a workspace tool, not IDP
        secrets:
          service_account_key:
            value: "<GOOGLE_SERVICE_ACCOUNT_B64>"
        configuration:
          service-user: "<GOOGLE_SERVICE_USER>"
          site-urls:
            - https://sites.google.com/your-org/your-site
          site-configs:
            https://sites.google.com/your-org/your-site
              # If you have a custom domain for your Google Site, specify it here.
              top-level-url: https://your-custom-domain.com/path

              # If you want to configure deeplinks for each page,
              # you can do it by providing a "page name" -> "URL suffix" map here.
              #
              # For a page titled "Home", the deeplink would be:
              # https://your-custom-domain.com/path/home
              page-name-to-url-suffix:
                Home: /home
                About: /about

              # If you have setup "Restricted" access for your site, specify it here.
              # Default is `false`.
              restricted: true
If you do not prefer to have a static configuration for deeplinks, you can also provide a “url path” on each Google Site page. Simply add a text in the form of urlpath:[/relative-path-to-your-page] in the body of each page, and Atolio will index the page with the user-provided deeplink.
Exported entries also carry a rendezvous-completed flag and a status block reporting each source’s current state and last validation result. Those fields are managed by Atolio. Leave them untouched on existing entries, and omit them when adding a new entry by hand as shown above.
Import the edited file to write the configuration back into the stack:
atolioctl configure import lumen-connectors.yaml --jwt-token-sdk ${JWT_TOKEN} --feeder-address :8889
Import writes the configuration into the stack after checking that the YAML is well formed. It does not contact Google. The connector validates the credentials and connection itself when it starts and picks up the configuration, and it reads users after that. If something is wrong, the source reports as misconfigured and the connector pod logs the error. See Troubleshooting for the specific messages.
Configuration Schema
In the exported file, every source lives at connectors.<connector>.<instance>.<source>, so the Google Sites source sits at connectors.google.default.gsites.
GoogleSitesSourceConfiguration
Google Sites connector configuration.
| Field | Type | Required | Default | Description |
|---|---|---|---|---|
connector | string | yes | N/A | Parent connector to reference (can be self) |
instance | string | yes | N/A | Multi-state config variable used for certain connectors, often default |
source | string | yes | N/A | Sub-connector reference (can be self), often object key |
common | Common | yes | N/A | Common connector settings. |
secrets | Secrets | yes | N/A | Secret credentials for authentication. |
configuration | GSitesConfiguration | yes | N/A | Google Sites-specific configuration. |
Common
Common settings shared across all connectors.
| Field | Type | Required | Default | Description |
|---|---|---|---|---|
enabled | boolean | yes | N/A | Set to true to run the source. |
identity-provider | boolean | yes | N/A | Set to true so Atolio uses this connector to resolve logins to users. |
cron-spec | string | no | 0 7 * * * | Cron expression for periodic re-sync of users (e.g., 0 7 * * *). Omit to sync only on demand. |
Secrets
Sensitive configuration values for authentication.
| Field | Type | Required | Default | Description |
|---|---|---|---|---|
service_account_key | SecretValue | yes | N/A | Google service account key in Base64 to authenticate to Google Workspace. |
SecretValue
A reference to a secret value.
| Field | Type | Required | Default | Description |
|---|---|---|---|---|
value | string | yes | N/A | The secret value (typically Base64-encoded). |
GSitesConfiguration
Google Sites-specific connector configuration.
| Field | Type | Required | Default | Description |
|---|---|---|---|---|
domains | string | no | "" | Comma-separated list of allowed customer domains. If empty, all domains are considered. |
service-user | string | yes | N/A | Email address of an administrator within the Google Workspace account. |
site-urls | string[] | yes | N/A | List of top-level Google Site URLs to index (e.g., https://sites.google.com/your-org/your-site). |
site-configs | map[string]SiteConfig | no | N/A | Optional map of site-specific configuration indexed by site URL. |
SiteConfig
Per-site configuration for Google Sites.
| Field | Type | Required | Default | Description |
|---|---|---|---|---|
top-level-url | string | no | N/A | Custom domain URL for the site if using a custom domain. |
page-name-to-url-suffix | map[string]string | no | N/A | Map of page names to URL suffixes for generating deeplinks (e.g., Home: /home). |
restricted | boolean | no | false | Set to true if the site has restricted access enabled. |
2.10 - HubSpot Connector
Index HubSpot CRM tickets and users by creating a private app in your HubSpot account.
The HubSpot connector enables the indexing of HubSpot CRM tickets and users using the HubSpot API through a private app in your HubSpot account.
Indexed tickets respect HubSpot’s record-level permissions: a ticket is only searchable in Atolio by users who are permitted to view that ticket in HubSpot.
Create a Private App
The connector authenticates using a private app access token. To create the private app, you must be a super admin in your HubSpot account.
- In HubSpot, navigate to Settings → Integrations → Private Apps.
- Click Create a private app.
- On the Basic Info tab, choose a name for the app, e.g.
Atolio. - On the Scopes tab, add the following scopes:
oauthticketscrm.objects.users.readsettings.users.read
- Click Create app.
All four scopes are required. The connector verifies them on startup and will fail with a “missing scopes” error if any are absent.
After the app is created, collect the two credentials the connector needs:
- The access token, found on the app’s Auth tab.
- The client secret, also found on the app’s Auth tab. This is used to verify the authenticity of webhook events sent by HubSpot.
Configure Webhooks
The connector receives ticket changes in real time via HubSpot webhooks. HubSpot does not allow these subscriptions to be created via the API, so they must be configured manually in the private app.
Open your private app and go to the Webhooks tab.
Set the Target URL to your Atolio deployment’s callback URL. Your Deployment Engineer will provide this; it has the form:
https://<your-atolio-connector-host>/connectors/hubspot/<instance>/callback/hubspotCreate subscriptions for the following event types, applied to Tickets:
- Creation (
ticket.creation) - Property change (
ticket.propertyChange) - Deletion (
ticket.deletion)
- Creation (
Note: The target URL registered in HubSpot must exactly match the callback URL configured on the Atolio side. Webhook signatures are computed over the full URL, so any mismatch causes all events to be rejected.
Webhooks cover ticket changes only. Changes to users (and to ticket permissions) are picked up by the periodic sync described below.
Provide Configuration
Provide the following values to your Deployment Engineer for them to configure in Atolio:
| Parameter | Type | Required | Default | Description |
|---|---|---|---|---|
access_token | secret | Yes | — | Access token of the private app you created. |
client_secret | secret | Yes | — | Client secret of the private app, used to verify webhook signatures. |
base_url | string | Yes | — | HubSpot API base URL. In most cases this should be https://api.hubapi.com. |
resources | map | No | {} | Per-resource include/exclude filters (see Content Filtering). |
Sync Behavior
The connector syncs incrementally: each run fetches only tickets and users modified since the previous run. On first run, all tickets and users are indexed.
Periodic syncs are scheduled with the connector’s cron-spec, e.g. */30 * * * * to sync every 30 minutes. The periodic sync is what picks up user changes and ticket permission changes, since webhooks only deliver ticket content changes.
The connector automatically paces its requests to stay within HubSpot’s search API rate limits.
Content Filtering
Atolio supports the ability to avoid certain content from being indexed at all. You can provide inclusions or exclusions with respect to each resource type:
- Users can be filtered w.r.t. their email addresses.
- Tickets can be filtered w.r.t. their ticket IDs.
An example of an inclusions/exclusions configuration would be as follows:
resources:
    user:
        excluded:
            - external_contractor@example.com # user email
    ticket:
        excluded:
            - "1234567890" # ticket ID
If you need content filtering, provide the inclusions & exclusions similar to the above to your Deployment Engineer.
Limitations
- Only tickets with an owner and a subject are indexed. Tickets without an assigned owner are skipped.
- HubSpot service accounts (integration users) are excluded from user indexing.
- Other CRM objects (contacts, companies, deals) are not currently indexed.
2.11 - Keycloak Connector
Provides app-user mappings stored in Keycloak.
The Keycloak connector reads the users in a realm so that Atolio can resolve each signed-in identity to an Atolio user. Every user is ingested under their Keycloak user ID, which is the same identifier Keycloak puts in the sub claim of an OIDC token. That match is what lets Atolio connect a login back to the right user.
Note: As part of Atolio Configuration, this connector should be selected as Identity Provider if it is used to resolve app-user mappings. Point it at the same realm your users authenticate against in Keycloak authentication.
Setting up the connector takes three steps:
- Create a read-only service account in Keycloak (done by your Keycloak admin).
- Deploy the connector pod into the Atolio cluster (done by your Deployment Engineer).
- Configure the source with
atolioctl(done by your Deployment Engineer).
Step 1: Create a Service Account in Keycloak
The connector talks to the Keycloak Admin REST API as a realm user, so we recommend creating a dedicated service account rather than using a personal admin account. The connector only reads users; it does not write to Keycloak or read any other resource.
- In the admin console, select your realm and create a user under “Users” (e.g.
atolio-connector). - On the new user’s “Credentials” tab, set a password and turn off “Temporary” so it does not expire on first use.
- On the “Role mapping” tab, click “Assign role”, filter by clients, and assign the
view-usersrole fromrealm-management. This is the lowest-privilege role that lets the connector list users in the realm.
The connector authenticates with this username and password against the realm’s built-in admin-cli client using the OAuth2 password grant, then refreshes the resulting token as needed. No additional client setup is required, since admin-cli exists in every realm by default.
Note:
view-usersis scoped to the realm you assign it in. If your users live in more than one realm, deploy a connector instance per realm, each with its own service account. If you rotate the service account’s password in Keycloak, update thepasswordsecret (Step 3) so the connector can keep authenticating.
Collect these values to use in the following steps:
| Value | Description | Example |
|---|---|---|
| Base URL | Root URL of your Keycloak instance. Include a context path such as /auth if your Keycloak uses one. | https://keycloak.example.com |
| Realm | The realm that holds your users and the service account. | employees |
| Username | The service account username created above. | atolio-connector |
| Password | The service account password. Provided as the password secret. |
Step 2: Deploy the Connector
Before the source can be configured, the connector pod must be running in the cluster. Connectors are deployed by enabling them in values-lumen.yaml. See Deploying Connectors for the full details, including how instances work.
connectors:
  keycloak:
    default:
      enabled: true
default is the instance identifier. Treat it as immutable once set, because the instance is part of every resource identifier the connector ingests. Apply the change by upgrading the lumen Helm chart with create-infra.sh (recommended) or helm upgrade as described in the sources overview.
Step 3: Configure the Source
Source configuration can be applied in two ways:
Recommended (v4.24+): Use the Admin console to configure this source through the browser. You can paste the YAML configuration shown below directly into the Admin console.
Alternative: Use atolioctl via the command line (for Deployment Engineers). If using atolioctl, follow Configuring Sources first. The commands below also need an API token in JWT_TOKEN and the address the feeder server’s gRPC endpoint, both described next.
atolioctl Prerequisites
JWT_TOKEN holds the API token atolioctl uses to authenticate to the feeder. Generate one from the deployment’s Helm values directory, which holds the values-lumen.yaml and values-lumen-templated.yaml files produced by create-infra.sh. The token is signed with the deployment’s jwtSecretKey, and the atolio:*:*:* match pattern grants access across all connectors, instances, and resources:
export JWT_TOKEN=$(atolioctl connector create-jwt --raw --config-dir . "atolio:*:*:*")
--feeder-address is the gRPC address of the feeder server that is used to read and write source configuration through. The standard path is to port-forward the in-cluster service/feeder and point atolioctl at it on localhost:
# Run K8s port forward to feeder as background to re-use same shell
kubectl port-forward -n atolio-svc service/feeder 8889 &
With that port-forward running in current terminal or another, the examples below use --feeder-address :8889. The empty host means localhost, and because the port is not 443 the connection is made in plaintext, which is what the port-forward exposes. If the feeder is instead published on a load balancer, pass that address with port 443, for example --feeder-address feed.search.example.com:443, which connects over TLS.
Edit and Apply the Configuration
Source configuration is stored as a single document that covers every configured connector. The supported workflow is to export the current configuration, edit it, then import it back. Always start from a fresh export so you do not overwrite a change made elsewhere.
Export the current configuration to a local file:
atolioctl configure export --jwt-token-sdk ${JWT_TOKEN} --feeder-address :8889 lumen-connectors.yaml
Add a Keycloak entry alongside the connectors already in the file, substituting the values you collected in Step 1:
connectors:
  # ...existing connectors left in place...
  keycloak:
    default:
      keycloak:
        connector: keycloak
        instance: default
        source: keycloak
        common:
          enabled: true
          identity-provider: true      # This connector is the identity provider
          cron-spec: 0 7 * * *         # Re-sync users on this schedule
        secrets:
          password:
            value: "<SERVICE_ACCOUNT_PASSWORD>"
        configuration:
          base_url: https://keycloak.example.com
          realm: employees
          username: atolio-connector
Exported entries also carry a rendezvous-completed flag and a status block reporting each source’s current state and last validation result. Those fields are managed by Atolio. Leave them untouched on existing entries, and omit them when adding a new entry by hand as shown above.
Import the edited file to write the configuration back into the stack:
atolioctl configure import lumen-connectors.yaml --jwt-token-sdk ${JWT_TOKEN} --feeder-address :8889
Writing key: /lumen/connectors/keycloak/default/keycloak
Import writes the configuration into the stack after checking that the YAML is well formed. It does not contact Keycloak. The connector validates the credentials and connection itself when it starts and picks up the configuration, and it reads users after that. If something is wrong, the source reports as misconfigured and the connector pod logs the error. See Troubleshooting for the specific messages.
Configuration Schema
In the exported file, every source lives at connectors.<connector>.<instance>.<source>, so the Keycloak source sits at connectors.keycloak.default.keycloak.
KeycloakSourceConfiguration
Keycloak connector configuration for user identity mapping.
| Field | Type | Required | Default | Description |
|---|---|---|---|---|
connector | string | yes | N/A | Parent connector to reference (can be self) |
instance | string | yes | N/A | Multi-state config variable used for certain connectors, often default |
source | string | yes | N/A | Sub-connector reference (can be self), often object key |
common | Common | yes | N/A | Common connector settings. |
secrets | Secrets | yes | N/A | Secret credentials for authentication. |
configuration | KeycloakConfiguration | yes | N/A | Keycloak-specific configuration. |
Common
Common settings shared across all connectors.
| Field | Type | Required | Default | Description |
|---|---|---|---|---|
enabled | boolean | yes | N/A | Set to true to run the source. |
identity-provider | boolean | yes | N/A | Set to true so Atolio uses this connector to resolve logins to users. |
cron-spec | string | no | N/A | Cron expression for periodic re-sync of users (e.g., 0 7 * * *). Omit to sync only on demand. |
Secrets
Sensitive configuration values for authentication.
| Field | Type | Required | Default | Description |
|---|---|---|---|---|
password | SecretValue | yes | N/A | Service account password created in Step 1. |
SecretValue
A reference to a secret value.
| Field | Type | Required | Default | Description |
|---|---|---|---|---|
value | string | yes | N/A | The secret value. |
KeycloakConfiguration
Keycloak-specific connector configuration.
| Field | Type | Required | Default | Description |
|---|---|---|---|---|
base_url | string | yes | N/A | Root URL of your Keycloak instance (e.g., https://keycloak.example.com). Include a context path such as /auth if your Keycloak uses one. |
realm | string | yes | N/A | Keycloak realm holding your users and the service account. |
username | string | yes | N/A | Service account username created in Step 1. |
Troubleshooting
Almost all errors surface in the connector pod logs, not in the atolioctl output. The import command only checks that the YAML is well formed before writing it to the stack, so a malformed file is the one thing it catches directly. Everything else is reported by the connector as it runs through its lifecycle.
The connector validates first. When it starts and picks up the configuration, it logs in to Keycloak to check the credentials and connection. If that fails, the source moves to a misconfigured state and stops before reading any users. Once validation passes, the connector lists users during its first sync, which is where a missing role shows up. Use the lifecycle phase in the table below to tell the two apart.
| Message | Phase | Cause | Resolution |
|---|---|---|---|
YAML decode error from atolioctl configure import | Import | The configuration file is not valid YAML or does not match the expected structure. | Fix the YAML. Re-export with atolioctl configure export to get a known-good starting point. |
missing secret "password" | Validation | No password secret was provided. | Add the password secret with the service account password from Step 1. |
base_url reported as invalid | Validation | base_url is empty or not a valid HTTP or HTTPS URL. | Set base_url to a full URL, e.g. https://keycloak.example.com. |
credential validation: login failed: 401 ... invalid_grant | Validation | Wrong username or password, or the account is disabled. | Confirm the service account credentials and that the user is enabled in the realm. |
credential validation: login failed: 404 ... | Validation | The realm value does not match a realm that holds the service account. | Set realm to the realm where you created the account. |
credential validation: login failed: ... dial tcp / no such host | Validation | base_url is unreachable from the cluster, or a context path is missing. | Verify base_url is reachable from the cluster, including a context path such as /auth if your Keycloak uses one. |
export user: user page: get users: 403 ... | User sync | The service account logged in but lacks permission to list users. | Assign the view-users role from realm-management on the account’s “Role mapping” tab. |
| Logins fail to resolve to a user | At sign-in | The connector realm differs from the realm used for authentication. | Point the connector at the same realm configured in Keycloak authentication. |
2.12 - Linear Connector
Index teams, projects, issues, and comments in Linear.
The Linear connector indexes teams, projects, issues, and comments across your Linear workspace.
Note: Atolio currently uses an API key for this connector, but will support a published Integration in a future release.
Create the Linear API key & Webhooks
As an administrator:
- Navigate to Workspace Settings by selecting your tenant and choosing
Preferences. - Under
My Account, click onAPI.
To create an API key, complete the following steps:
3. Under Personal API keys, provide a Label in the text box, e.g. Atolio.
4. Click on Create new API key.
5. Copy the value of the key to securely share with your Deployment Engineer.
To create a Webhook, complete the following steps:
6. Under Webhooks, click on Create new webhook.
7. Provide a Label in the text box, e.g. Atolio.
8. For URL, specify the URL provided by your Deployment Engineer. It will be similar to the following with your chosen DNS name:
https://relay.search.example.com/connectors/linear/default/callback/linear- Note: if you have multiple Linear instances, please make sure to provide the correct instance name in the URL above (i.e.
defaultin the example).
- Under
Data change events, ensure the following are checked:- Issues
- Projects
- Comments
- Copy the value of the
Signing secretto securely share with your Deployment Engineer. - Click on
Create webhookto finalize the creation of this webhook.
Provide Configuration
Once the API key and Webhook have been created, provide these configuration values to your Deployment Engineer:
UrlKeyis the name of your Linear workspace.Tokenis the personal access token.WebhookSecretis the webhook secret.
2.13 - Microsoft Connectors
Integrate with Entra ID for user mappings. Index SharePoint sites and Teams channels.
The Microsoft connectors support:
- Entra ID - for resolving user mappings across apps as an Identity Provider
- SharePoint - for indexing sites, docs, spreadsheets, slides, and other files
- Teams - for indexing channels, chat, and messages
- OneDrive - for indexing docs, spreadsheets, slides, and other files
- Outlook - for indexing emails and calendar events
Security Best Practice: Separate App Registrations
We recommend creating separate App Registrations for each Microsoft source you plan to use. This follows the principle of least privilege and provides:
- Reduced attack surface - Each connector only has the minimum permissions required
- Better audit trails - Azure logs can isolate which application accessed which data
- Independent lifecycle management - Rotate certificates, disable connectors, or modify permissions without affecting other sources
- Granular admin consent - Security teams can approve smaller, focused permission requests
- Independent rate limits - Each App Registration has separate Microsoft Graph API rate limits, preventing sources from competing for shared quotas in large environments
Architecture Options
Choose the approach that best fits your organization’s security and scale requirements:
Option 1: Separate App Registration per Source (Recommended)
Create individual App Registrations for:
- Entra ID (if using as identity provider)
- SharePoint
- Teams
- OneDrive
- Outlook
Each registration gets only the permissions needed for that specific source.
Option 2: Single Shared App Registration (Evaluation Only)
Use one App Registration for all sources. This requires the superset of all permissions and is not recommended for production environments due to security and rate limiting concerns.
Prerequisites
Before configuring any Microsoft connector, ensure you have:
Azure Access Requirements
- Azure tenant with appropriate licensing (Microsoft 365 E1+ for SharePoint/OneDrive, Teams Premium for meeting transcripts)
- Global Administrator or Cloud Application Administrator role to:
- Create App Registrations
- Grant application permissions
- Provide admin consent
- Certificate for authentication - See Certificate Generation Guide below
Atolio Environment
- Active Atolio deployment - Contact your Atolio onboarding team if you need assistance
- Configuration values - You’ll collect these from Azure and provide them to your Atolio support contact
Certificate Generation
Microsoft Graph API requires certificate-based authentication. Choose one option:
Option 1: Self-Signed Certificate (OpenSSL)
# Generate private key and certificate
openssl req -x509 -newkey rsa:2048 -keyout atolio-key.pem -out atolio-cert.pem -days 365 -nodes

# Create PFX file (no password)
openssl pkcs12 -export -out atolio-cert.pfx -inkey atolio-key.pem -in atolio-cert.pem -passout pass:

# Create CER file for Azure upload
openssl x509 -outform der -in atolio-cert.pem -out atolio-cert.cer

# Get base64-encoded PFX for Atolio configuration
cat atolio-cert.pfx | base64
Option 2: Self-Signed Certificate (PowerShell/Windows)
# Generate certificate
$cert = New-SelfSignedCertificate -Subject "CN=Atolio" -CertStoreLocation "Cert:\CurrentUser\My" -KeyExportPolicy Exportable -KeySpec Signature

# Export CER file for Azure
Export-Certificate -Cert $cert -FilePath "atolio-cert.cer"

# Export PFX file for Atolio (replace 'password' with your preferred password)
Export-PfxCertificate -Cert $cert -FilePath "atolio-cert.pfx" -Password (ConvertTo-SecureString -String "password" -Force -AsPlainText)

# Get base64-encoded PFX
[Convert]::ToBase64String([IO.File]::ReadAllBytes("atolio-cert.pfx"))
Common Setup Steps
All Microsoft connectors require these foundational steps:
- Create App Registration - Follow Entra ID - Create New App Registration
- Upload Certificate - Add your
.cerfile to the App Registration - Grant API Permissions - Add Application permissions (not Delegated) for each source:
- For Entra ID identity provider: Use only the directory permissions listed in the authentication guide
- For content sources: Use the specific permissions listed in each connector’s documentation
- Admin Consent - Click “Grant admin consent” in the API permissions page
Configuration Values
Collect these values from Azure and provide them to your Atolio support contact:
ClientCert- Base64-encoded content of the.PFXfile (from certificate generation step)ClientCertPassword- Certificate’s private key password (if you set one)TenantId- Directory (tenant) ID from the App Registration Overview pageClientId- Application (client) ID from the App Registration Overview page
Resource Filtering
All Microsoft connectors support filtering to limit indexing scope using YAML configuration in your connector settings:
resources:
  user:
    included:
      - arthur.dent@example.com
  group:
    excluded:
      - contractors@example.com
Common filter types include:
- User filters - Index content for specific user accounts
- Group filters - Index content accessible by specific Microsoft 365 groups
- LDAP group filters - Index content for members of specific Entra ID security/distribution groups (Outlook only)
- Site/Team filters - Index specific SharePoint sites or Teams
For detailed filtering options, see the individual connector documentation pages.
2.13.1 - OneDrive Connector Setup
Provide necessary API permissions to index OneDrive files.
Index OneDrive files by creating a dedicated App Registration with the appropriate permissions.
Setup Checklist
Before starting, ensure you have:
- Azure Global Administrator or Cloud Application Administrator role
- Microsoft 365 E1+ licensing for OneDrive content
- Certificate generated (see Certificate Generation Guide)
- Active Atolio deployment
Required API Permissions
Step 1: Create App Registration
- Navigate to Azure Portal > App Registrations
- Click “New registration”
- Enter name:
Atolio OneDrive - Select “Accounts in this organizational directory only”
- Click “Register”
Step 2: Add API Permissions
⚠️ Important: Only add Application permissions, not Delegated permissions
- In your App Registration, click “API permissions” in the left menu
- Click “Add a permission”
- Select “Microsoft Graph”
- Click “Application permissions” (not Delegated permissions)
Add these Microsoft Graph permissions:
Identity & Directory Permissions (Required for ACL mapping)
Application.Read.AllGroup.Read.AllGroupMember.Read.AllUser.Read.AllDirectory.Read.All(optional - can omit withdisable_full_permissions: truein configuration)
OneDrive Content Permissions
Files.Read.AllReports.Read.All(required for indexing progress display)
Step 3: Grant Admin Consent
- After adding all permissions, click “Grant admin consent for [your tenant name]” at the top of the API permissions page
- Confirm by clicking “Yes”
- Verify all permissions show “Granted for [your tenant name]” with green checkmarks
Step 4: Upload Certificate
- Click “Certificates & secrets” in the left menu
- Click “Upload certificate”
- Select your
.cerfile (not the.pfxfile) - Add description:
Atolio OneDrive Authentication - Click “Add”
Step 5: Collect Configuration Values
From the “Overview” page, copy:
- Application (client) ID
- Directory (tenant) ID
You’ll provide these along with your base64-encoded .pfx certificate to your Atolio support contact.
Resource Filtering
Limit indexing scope using resource filters. OneDrive supports multiple filter types:
User Filtering
Index OneDrive files for specific user accounts:
resources:
  user:
    included:
      - arthur.dent@example.com
      - ford.prefect@example.com
    excluded:
      - galactic-president@example.com
Group Filtering
Index OneDrive files accessible by Microsoft 365 groups:
resources:
  group:
    included:
      - engineering-group@example.com
    excluded:
      - contractors@example.com
Sample Configuration
Here’s a complete YAML configuration example for OneDrive:
connector: microsoft
source: onedrive
common:
  enabled: true
  identity-provider: false
  cron-spec: "10 */1 * * *"
secrets:
  client_cert:
    value: "<BASE64_ENCODED_PFX_CONTENT>"
  client_cert_password:
    value: "<CERTIFICATE_PASSWORD>"  # Optional if no password set
configuration:
  client-id: "<APPLICATION_CLIENT_ID>"
  tenant-id: "<DIRECTORY_TENANT_ID>"
  disable_full_permissions: false
  resources:
    user:
      included:
        - john.doe@contoso.com
        - jane.smith@contoso.com
    group:
      excluded:
        - contractors@contoso.com
Troubleshooting
| Error | Cause | Solution |
|---|---|---|
401 Unauthorized | Missing admin consent | Click “Grant admin consent” in API permissions |
403 Forbidden | Wrong permission type | Ensure you added Application permissions, not Delegated |
invalid_client | Certificate not found/expired | Verify certificate is uploaded and valid |
| OneDrive files not appearing | Missing Files.Read.All permission | Add permission and re-grant admin consent |
| User drives missing | User not in included list | Check user filtering configuration |
2.13.2 - Outlook Connector Setup
Provide necessary API permissions to index Outlook emails and calendar events.
Index Outlook emails and events by creating a dedicated App Registration with the appropriate permissions.
Setup Checklist
Before starting, ensure you have:
- Azure Global Administrator or Cloud Application Administrator role
- Microsoft 365 licensing for Outlook content
- Certificate generated (see Certificate Generation Guide)
- Active Atolio deployment
Required API Permissions
Step 1: Create App Registration
- Navigate to Azure Portal > App Registrations
- Click “New registration”
- Enter name:
Atolio Outlook - Select “Accounts in this organizational directory only”
- Click “Register”
Step 2: Add API Permissions
⚠️ Important: Only add Application permissions, not Delegated permissions
- In your App Registration, click “API permissions” in the left menu
- Click “Add a permission”
- Select “Microsoft Graph”
- Click “Application permissions” (not Delegated permissions)
Add these Microsoft Graph permissions:
Identity & Directory Permissions (Required for ACL mapping)
Application.Read.AllGroup.Read.AllGroupMember.Read.AllUser.Read.AllDirectory.Read.All(optional - can omit withdisable_full_permissions: truein configuration)
Outlook Content Permissions
Mail.ReadCalendars.ReadMailboxSettings.ReadDomain.Read.All
Step 3: Grant Admin Consent
- After adding all permissions, click “Grant admin consent for [your tenant name]” at the top of the API permissions page
- Confirm by clicking “Yes”
- Verify all permissions show “Granted for [your tenant name]” with green checkmarks
Step 4: Upload Certificate
- Click “Certificates & secrets” in the left menu
- Click “Upload certificate”
- Select your
.cerfile (not the.pfxfile) - Add description:
Atolio Outlook Authentication - Click “Add”
Step 5: Collect Configuration Values
From the “Overview” page, copy:
- Application (client) ID
- Directory (tenant) ID
You’ll provide these along with your base64-encoded .pfx certificate to your Atolio support contact.
Resource Filtering
Limit indexing scope using resource filters. Outlook supports multiple filter types:
User Filtering
Index mailboxes for specific user accounts:
resources:
  user:
    included:
      - arthur.dent@example.com
      - ford.prefect@example.com
    excluded:
      - galactic-president@example.com
LDAP Group Filtering
Index mailboxes for members of Entra ID security/distribution groups:
resources:
  ldap:
    included:
      - f47ed439-7c7d-430d-aff3-0acecdec2cae  # Engineering Security Group (ObjectId)
LDAP Group Filter Notes:
- Accepts Entra ID group ObjectIds (GUIDs) or distinguished names
- Filters based on transitive group membership
- Only indexes mailboxes of group members
- Only a single LDAP group filter is supported at a time
- Use Azure AD PowerShell or Graph Explorer to find group ObjectIds
Manually Specify Email Address Domains
If email address domains of your organization are already listed in MS Graph API /domains query, you can skip this step.
For Atolio to identify contributors of Outlook resources correctly, a list of email address domains must be known. If users in your organization have email addresses like user1@example.com and user2@contoso.com, this list should consist of example.com, and contoso.com.
You can manually specify an email address domain list as part of your configuration in the following format:
known-domains:
  - example.com
  - contoso.com
Sample Configuration
Here’s a complete YAML configuration example for Outlook:
connector: microsoft
source: outlook
common:
  enabled: true
  identity-provider: false
  cron-spec: "20 */1 * * *"
secrets:
  client_cert:
    value: "<BASE64_ENCODED_PFX_CONTENT>"
  client_cert_password:
    value: "<CERTIFICATE_PASSWORD>"  # Optional if no password set
configuration:
  client-id: "<APPLICATION_CLIENT_ID>"
  tenant-id: "<DIRECTORY_TENANT_ID>"
  disable_full_permissions: false
  disable-attachments: true    # Set to false to index email attachments
  backfill-start-time: "2025-01-01T00:00:00Z"  # Index emails from this date
  known-domains:
    - contoso.com
    - example.com
  resources:
    user:
      included:
        - arthur.dent@example.com
        - ford.prefect@example.com
    ldap:
      included:
        - f47ed439-7c7d-430d-aff3-0acecdec2cae  # Atolio Users Group
Troubleshooting
| Error | Cause | Solution |
|---|---|---|
401 Unauthorized | Missing admin consent | Click “Grant admin consent” in API permissions |
403 Forbidden | Wrong permission type | Ensure you added Application permissions, not Delegated |
invalid_client | Certificate not found/expired | Verify certificate is uploaded and valid |
| Mailboxes not appearing | Missing mail permissions | Verify Mail.Read and Calendars.Read permissions |
| LDAP filtering not working | Invalid group ObjectId | Use Azure AD PowerShell to verify group ID |
| Contributor identification issues | Missing known-domains | Add all organization email domains to configuration |
2.13.3 - SharePoint Connector Setup
Provide necessary API permissions to index SharePoint sites.
Index SharePoint sites, pages, and files by creating a dedicated App Registration with the appropriate permissions.
Setup Checklist
Before starting, ensure you have:
- Azure Global Administrator or Cloud Application Administrator role
- Microsoft 365 E1+ licensing for SharePoint content
- Certificate generated (see Certificate Generation Guide)
- Active Atolio deployment
Required API Permissions
Step 1: Create App Registration
- Navigate to Azure Portal > App Registrations
- Click “New registration”
- Enter name:
Atolio SharePoint - Select “Accounts in this organizational directory only”
- Click “Register”
Step 2: Add API Permissions
⚠️ Important: Only add Application permissions, not Delegated permissions
- In your App Registration, click “API permissions” in the left menu
- Click “Add a permission”
- Select “Microsoft Graph”
- Click “Application permissions” (not Delegated permissions)
Add these Microsoft Graph permissions:
Identity & Directory Permissions (Required for ACL mapping)
Application.Read.AllGroup.Read.AllGroupMember.Read.AllUser.Read.AllDirectory.Read.All(optional - can omit withdisable_full_permissions: truein configuration)
SharePoint Content Permissions
Files.Read.AllSites.Read.All
Step 3: Grant Admin Consent
- After adding all permissions, click “Grant admin consent for [your tenant name]” at the top of the API permissions page
- Confirm by clicking “Yes”
- Verify all permissions show “Granted for [your tenant name]” with green checkmarks
Step 4: Upload Certificate
- Click “Certificates & secrets” in the left menu
- Click “Upload certificate”
- Select your
.cerfile (not the.pfxfile) - Add description:
Atolio SharePoint Authentication - Click “Add”
Step 5: Collect Configuration Values
From the “Overview” page, copy:
- Application (client) ID
- Directory (tenant) ID
You’ll provide these along with your base64-encoded .pfx certificate to your Atolio support contact.
SharePoint Site Groups & Associated Permissions
Many SharePoint sites are deployed without connecting to Microsoft Office 365 groups. Microsoft treats certain SharePoint configurations as unsupported unless managed through Office 365 groups. For Atolio to index correct permissions on non-O365 managed sites, the Sites.FullControl.All permission is required. Communication Sites commonly fall into this category. For more information on connecting sites to O365 groups, see Microsoft’s documentation.
Atolio can index these sites if Sites.FullControl.All permission is set on your App Registration. This is the least privileged permission available for read access to the SharePoint API. Atolio never writes back to the SharePoint API.
When configuring the connector for non-O365 group sites:
- Set
Sites.FullControl.Allpermissions on the App Registration, specifically within the SharePoint API. (see below screenshot) - Set
IndexSharePointPermissionsconfiguration to true
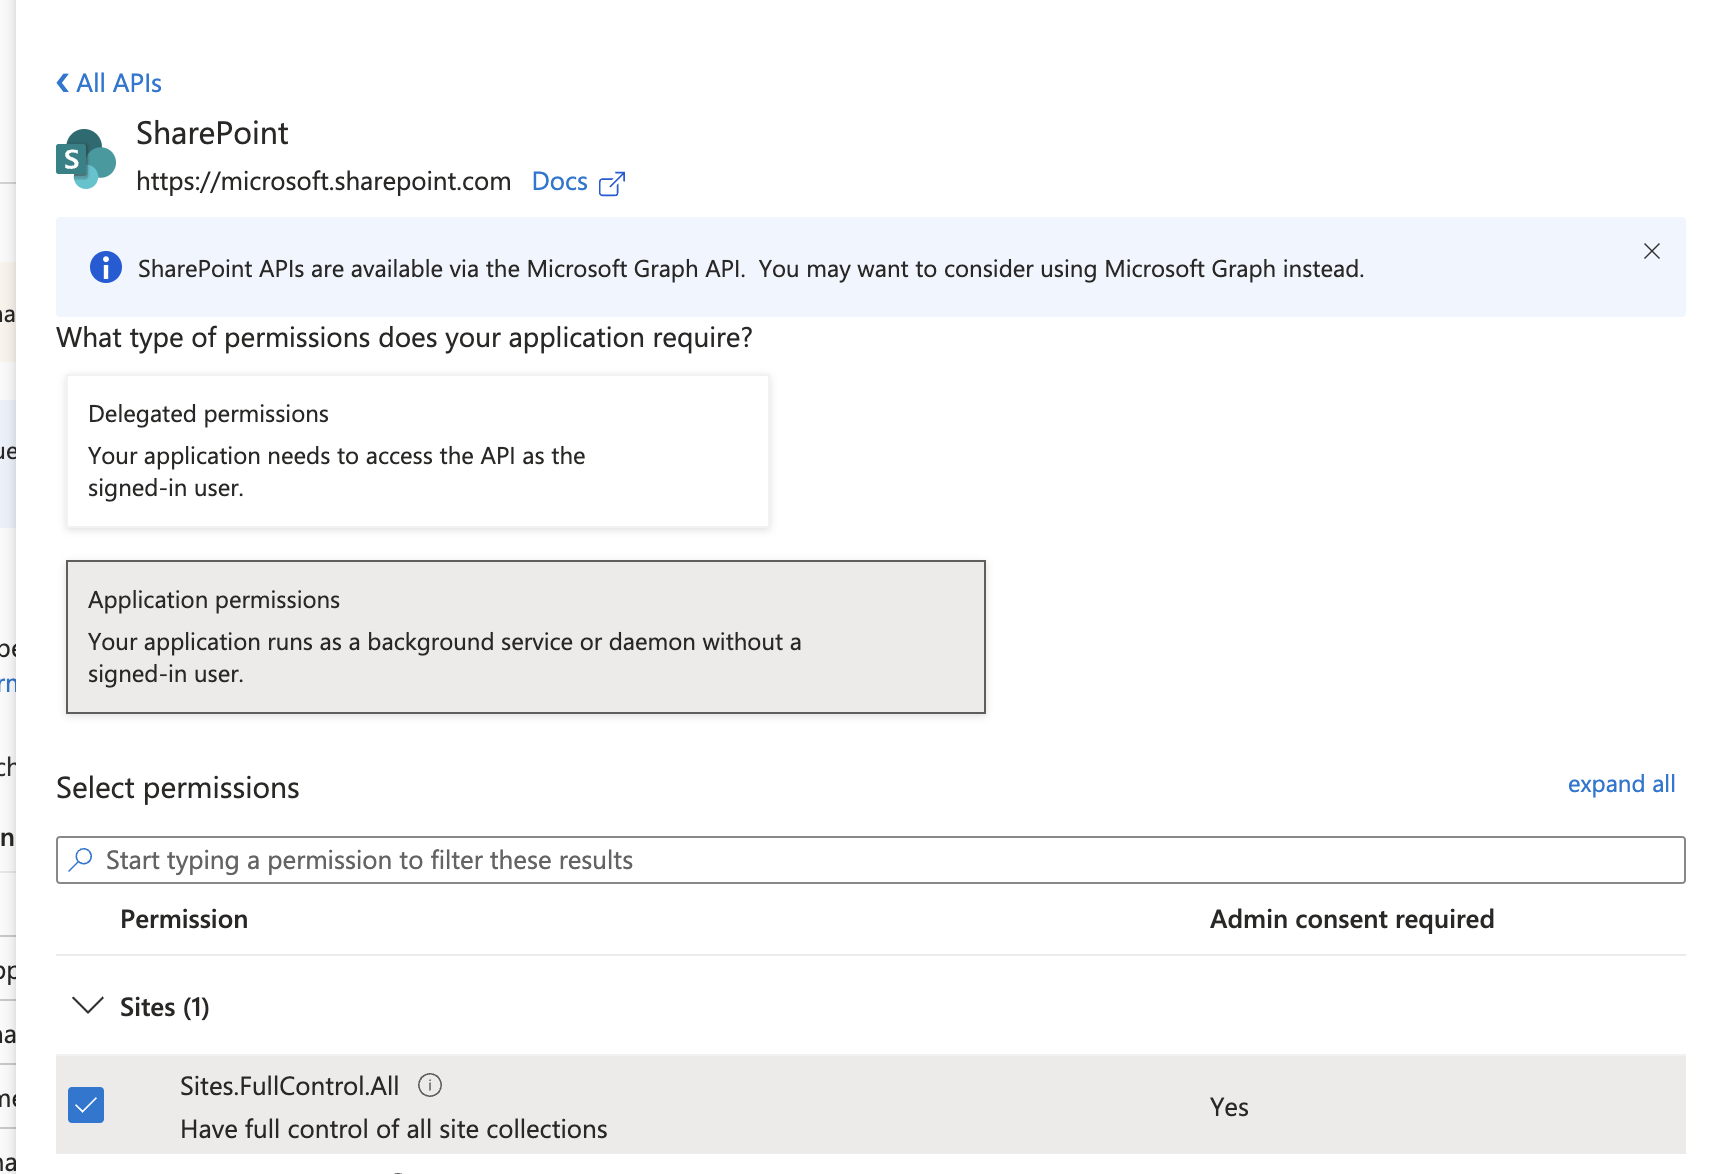
All other configuration and certificates remain the same.
Resource Filtering
Limit indexing scope using resource filters. SharePoint supports site-specific filtering:
Site Filtering
Index specific SharePoint sites by URL:
resources:
  site:
    included:
      - https://contoso.sharepoint.com/sites/Engineering
      - https://contoso.sharepoint.com/sites/Marketing
    excluded:
      - https://contoso.sharepoint.com/sites/Confidential
Sample Configuration
Here’s a complete YAML configuration example for SharePoint:
connector: microsoft
source: sharepoint
common:
  enabled: true
  identity-provider: false
  cron-spec: "30 */1 * * *"
secrets:
  client_cert:
    value: "<BASE64_ENCODED_PFX_CONTENT>"
  client_cert_password:
    value: "<CERTIFICATE_PASSWORD>"  # Optional if no password set
configuration:
  client-id: "<APPLICATION_CLIENT_ID>"
  tenant-id: "<DIRECTORY_TENANT_ID>"
  disable_full_permissions: false
  index_sharepoint_permissions: true  # Required for non-O365 group sites
  resources:
    site:
      included:
        - https://contoso.sharepoint.com/sites/Engineering
        - https://contoso.sharepoint.com/sites/Marketing
Troubleshooting
| Error | Cause | Solution |
|---|---|---|
401 Unauthorized | Missing admin consent | Click “Grant admin consent” in API permissions |
403 Forbidden | Wrong permission type | Ensure you added Application permissions, not Delegated |
invalid_client | Certificate not found/expired | Verify certificate is uploaded and valid |
| Sites not appearing | Missing Sites.FullControl.All | Add SharePoint API permission for non-O365 group sites |
| Permission errors on specific sites | Site not connected to O365 group | Set index_sharepoint_permissions: true |
2.13.4 - Teams Connector Setup
Provide necessary API permissions to index Teams channels.
Index Teams channels, chat, messages, and meeting transcripts by creating a dedicated App Registration with the appropriate permissions.
Setup Checklist
Before starting, ensure you have:
- Azure Global Administrator or Cloud Application Administrator role
- Teams Premium licensing (for meeting transcripts)
- Certificate generated (see Certificate Generation Guide)
- Active Atolio deployment
Required API Permissions
Step 1: Create App Registration
- Navigate to Azure Portal > App Registrations
- Click “New registration”
- Enter name:
Atolio Teams - Select “Accounts in this organizational directory only”
- Click “Register”
Step 2: Add API Permissions
⚠️ Important: Only add Application permissions, not Delegated permissions
- In your App Registration, click “API permissions” in the left menu
- Click “Add a permission”
- Select “Microsoft Graph”
- Click “Application permissions” (not Delegated permissions)
Add these Microsoft Graph permissions:
Identity & Directory Permissions (Required for ACL mapping)
Application.Read.AllGroup.Read.AllGroupMember.Read.AllUser.Read.AllDirectory.Read.All(optional - can omit withdisable_full_permissions: truein configuration)
Teams Content Permissions
Channel.ReadBasic.AllChannelMember.Read.AllChannelMessage.Read.AllChat.Read.AllChatMember.Read.AllChatMessage.Read.AllTeam.ReadBasic.AllTeamMember.Read.All
Teams Meeting Transcripts (Optional)
OnlineMeetings.Read.AllOnlineMeetingTranscript.Read.AllCalendars.ReadDomain.Read.All
Step 3: Grant Admin Consent
- After adding all permissions, click “Grant admin consent for [your tenant name]” at the top of the API permissions page
- Confirm by clicking “Yes”
- Verify all permissions show “Granted for [your tenant name]” with green checkmarks
Step 4: Upload Certificate
- Click “Certificates & secrets” in the left menu
- Click “Upload certificate”
- Select your
.cerfile (not the.pfxfile) - Add description:
Atolio Teams Authentication - Click “Add”
Step 5: Collect Configuration Values
From the “Overview” page, copy:
- Application (client) ID
- Directory (tenant) ID
You’ll provide these along with your base64-encoded .pfx certificate to your Atolio support contact. This link is beside the Add a permission link.
Application Access Policy for Teams Meeting Transcripts
In addition to Entra ID permissions above, you need to setup an application access policy for Atolio to access transcripts.
- Open PowerShell. Install the Microsoft Teams PS module:
Install-Module -Name MicrosoftTeams -Force -AllowClobber
- Connect to Teams module w/ an admin account on your shell. This will prompt a login page on your browser:
Import-Module MicrosoftTeamsConnect-MicrosoftTeams
- Create a new policy. Assuming the policy name is “Atolio-Transcript-Access-Policy”, and the previously registered application ID (client ID) is “some-app-id”, the shell command will be as follows:
New-CsApplicationAccessPolicy -Identity Atolio-Transcript-Access-Policy -AppIds "some-app-id" -Description "Access policy for teams transcripts"
- Associate users with the policy. You have two options:
- Option 1 - Grant tenant-wide access (recommended). This will allow Atolio to index transcripts owned by every user who does not have an application access policy assigned:
Grant-CsApplicationAccessPolicy -PolicyName Atolio-Transcript-Access-Policy -Global
- Option 2 - Grant user-specific access. This will allow Atolio to index transcripts owned by explicitly declared users only:
Grant-CsApplicationAccessPolicy -PolicyName Atolio-Transcript-Access-Policy -Identity "some-user-id"
- Option 1 - Grant tenant-wide access (recommended). This will allow Atolio to index transcripts owned by every user who does not have an application access policy assigned:
More details about the policy setup can be found in the official documentation:
- https://learn.microsoft.com/en-us/graph/cloud-communication-online-meeting-application-access-policy
Tenant Settings for Transcript Access
For transcript support, clients must also set a tenant-wide Transcript API config as of July 31 2026.
Option 1 - Teams admin center
- Open the Teams admin center
- Go to Meetings > Meeting settings
- Under Transcript API access, turn Microsoft Graph access On
- Click Configure, and turn Include speaker attribution On
Option 2 - PowerShell
Reusing the MicrosoftTeams module session from the previous step:
Set-CsTeamsMeetingConfiguration -Identity Global -EnableGraphTranscriptAccess $true -EnableAttributedTranscripts $true
Verify the values afterwards:
Get-CsTeamsMeetingConfiguration -Identity Global | Select-Object EnableGraphTranscriptAccess, EnableAttributedTranscripts
Changes may take some time to propagate across the tenant.
More details about these settings can be found in the official documentation:
- https://learn.microsoft.com/en-us/graph/teams-changenotifications-callrecording-and-calltranscript#tenant-admin-control-over-transcript-subscriptions
- https://learn.microsoft.com/en-us/graph/api/calltranscript-get#tenant-administrator-controls-for-transcript-access
Resource Filtering
Limit indexing scope using resource filters. Teams supports team-specific filtering:
Team Filtering
Index specific Teams by name or ID:
resources:
  team:
    included:
      - 66e327b3-321a-4ebf-8e2c-34cebf134bf8 # Engineering Team ID
      - 0507654f-506d-4805-95d5-516bcaf1075c # Sales Team ID
    excluded:
      - b0b083d0-6288-45ce-8ecd-16960ba7b329 # HR Team ID
Sample Configuration
Here’s a complete YAML configuration example for Teams:
connector: microsoft
source: teams
common:
  enabled: true
  identity-provider: false
  cron-spec: "40 */1 * * *"
secrets:
  client_cert:
    value: "<BASE64_ENCODED_PFX_CONTENT>"
  client_cert_password:
    value: "<CERTIFICATE_PASSWORD>"  # Optional if no password set
configuration:
  client-id: "<APPLICATION_CLIENT_ID>"
  tenant-id: "<DIRECTORY_TENANT_ID>"
  disable_full_permissions: false
  enable-transcripts: true  # Enable meeting transcript indexing
  skip-chats: false        # Set to true to skip private chats
  resources:
    team:
      included:
        - 66e327b3-321a-4ebf-8e2c-34cebf134bf8 # Engineering Team ID
        - 0507654f-506d-4805-95d5-516bcaf1075c # Marketing Team ID
Troubleshooting
| Error | Cause | Solution |
|---|---|---|
401 Unauthorized | Missing admin consent | Click “Grant admin consent” in API permissions |
403 Forbidden | Wrong permission type | Ensure you added Application permissions, not Delegated |
invalid_client | Certificate not found/expired | Verify certificate is uploaded and valid |
| Teams not appearing | Missing team permissions | Verify all Teams permissions are granted |
| Transcripts missing | Application access policy not set | Follow PowerShell policy setup steps above |
Transcripts missing, 403 Forbidden with GraphAccessToTranscriptsDisabled | Graph API access to transcripts disabled for the tenant | Enable it, see Tenant Settings for Transcript Access |
Transcript metadata indexed but content missing, 403 Forbidden with SpeakerAttributionNotAllowed | Speaker attribution disabled for the tenant | Enable it, see Tenant Settings for Transcript Access |
| Private chats missing | Chat.Read.All permission missing | Add permission and re-grant admin consent |
Limitations
- Only first 1000 replies to a channel post will be indexed, due to limitations with the Microsoft API.
2.14 - Notion Connector
Index databases, pages, and comments in Notion.
The Notion connector indexes databases, pages, and comments across your Notion workspace.
Create the Notion integration
As an administrator, you can either follow the steps below or navigate directly to My Integrations:
- Click on
Settings & members. - Under
Workspace, click onConnections. - Click the link for
Develop or manage integrations.
Create a new Internal integration by following the steps below:
- Choose the associated workspace and give it an appropriate name, e.g. Atolio.
- (Optional) Use the Atolio logo here, if needed.
- Under
Secrets, copy theInternal Integration Secretto share with your Deployment Engineer. - Under
Capabilities:
- Only “Read content” and “Read comments” are necessary. The other permissions can be removed.
- Ensure that “Read user information including email addresses” is enabled.
- Click
Save changes.
Once the integration has been created, provide the secret copied above to your Deployment Engineer for configuration in your Atolio deployment.
2.15 - Okta Connector
Provides app-user mappings stored in Okta.
The Okta connector provides identity mappings for each user based on the apps that they use.
Note: As part of Atolio Configuration, this connector should be selected as Identity Provider if it is used to resolve app-user mappings.
Service Account and Required Permissions
Okta API tokens inherit the permissions of the user that creates them, so we recommend creating a dedicated service account rather than using a personal admin account. The connector only performs read operations against Okta (users, groups, applications, application users, and the System Log).
Assign one of the following to the service account:
- Read-only Administrator (built-in role) — the simplest option, and the lowest-privilege built-in role that covers everything the connector needs.
- A custom admin role with these read permissions, scoped to all users, all groups, and all apps:
okta.users.readokta.groups.readokta.apps.readokta.logs.readokta.reports.read
Note: The connector tolerates per-request
403 Forbiddenresponses and continues processing other events, so an under-scoped token will produce incomplete data rather than a hard failure. If you scope the role to a subset of users, groups, or apps, anything outside that scope will silently be missing from search results.
Creating an API Token
Sign in as the service account and create the token at https://example.okta.com/admin/access/api/tokens (replacing example.okta.com with your Okta domain). See Okta’s Create an API token guide for full details.
Note: Okta revokes API tokens after 30 days of inactivity. The connector polls Okta continuously and keeps the token active during normal operation, but if the connector is paused or disabled for an extended period the token will need to be regenerated.
Manager Resolution
By default, user managers are resolved using the following hierarchy to build reporting structures:
- The
managerlinked object primary relationship, when your org defines one. - The
managerIdprofile attribute, as a fallback when the linked object is absent or the lookup fails.
Some organizations populate neither of these and may sync manager identifiers to custom
profile attributes. For these cases, an optional managerResolution configuration
resolves managers from a user’s profile attribute:
managerResolution:
  # Attribute on the user's profile holding the manager reference.
  managerAttribute: managerEmail
  # Attributes on the manager's own profile the reference is matched against.
  matchAttributes:
    - email
    - login
With this example configuration:
        user                                        manager
┌──────────────────────────┐          ┌──────────────────────────────┐
│ profile:                 │          │ id: 00u4abc123               │
│   managerEmail: ─────────┼─────────▶│ profile:                     │
│    jane.doe@atolio.com   │  matches │   email: jane.doe@atolio.com │
└──────────────────────────┘          │   login: jdoe@atolio.com     │
     managerAttribute                 └──────────────────────────────┘
                                             matchAttributes
                                                   │
                                 user's manager ◀──┘ (id: 00u4abc123)
If the attribute on the user’s profile already contains the manager’s Okta user ID, simply specify the attribute which should be used for lookup:
managerResolution:
  managerAttribute: managerIdSynced
Provide Configuration
Provide the following configuration values to your Deployment Engineer in order to complete these steps:
Hostname, the host name for your Okta instance (e.g.example.okta.com)Token, the API Token created aboveManagerResolution(optional), if manager data lives in custom profile attributes as described above
2.16 - Salesforce Connector
Index top level resources such as Accounts, Contacts, Cases, Opportunities, Leads by installing an External Client App.
The Salesforce connector enables the indexing of Salesforce objects, such as Accounts and Opportunities, using the Salesforce REST API by creating an External Client App in your Salesforce instance.
Note: Salesforce’s External Client Apps (ECA) are the successor to the legacy Connected Apps and follow a least-privilege model with explicit permission grants.
Setup External Client App
Note: The setup assumes that you are using the lightning experience of Salesforce.
Identify the integration user
Before creating the External Client App, identify or create the Salesforce user that Atolio will run as. Later steps grant this user access to the app and permission to read data.
As a best practice, we recommend a dedicated user rather than a real person’s account (turnover, MFA, password resets on a human account will break the integration). Any Salesforce user license works — a Salesforce Integration license is the cheapest option and is designed for this use case.
To create one: Setup → Users → Users → New User. Note the username; you will reference this user in the steps below as the integration user.
Create the External Client App
- As an administrator, navigate to Setup.
- In the Quick Find box, search for “External Client App Manager” and open it.
- Click “New External Client App”.
- Choose an
External Client App NameandAPI Name, e.g. Atolio. - Choose an email for
Contact Email. - (Optional) For
Logo Image URLand/orIcon URL, you can use the Atolio logo here.
- Under “API (Enable OAuth Settings)”, select
Enable OAuth.
- For
Callback URL, enter a valid URL (e.g. https://atolio.example.com) — Atolio does not use this login flow for authentication. - For
Selected OAuth Scopes, add only the “Manage user data via APIs (api)” scope. Do not add the “Full access (full)” scope — Salesforce now rejects token requests for External Client Apps configured with overly broad scopes. - Under “Flow Enablement”, check
Enable Client Credentials Flowand acknowledge the security prompt.
- Click “Create” to save the External Client App.
Next, configure the app’s policies:
- From the External Client App Manager, open your new app and go to the “Policies” tab, then click “Edit”.
- Under “OAuth Policies”:
- Set
Permitted Usersto “Admin approved users are pre-authorized”. - Check “Enable Client Credentials Flow”, and under the newly revealed
Run Assection, setRun Asto the integration user identified above.
- Save the policy changes.
Finally, grant the integration user access to the External Client App. Unlike Connected Apps, ECAs require explicit assignment via a permission set (profile-based access is not supported):
- From Setup, navigate to “Users” -> “Permission Sets” and click “New”.
- Give the permission set a name (e.g.
Atolio External Client App Access) and save. - Open the new permission set and go to “External Client App Access Settings” (or “Assigned External Client Apps”, depending on your org).
- Enable your Atolio External Client App.
- Assign this permission set to the integration user identified above.
Integration User Permissions
Access to the External Client App only lets the integration user authenticate — it does not grant permission to read any data. Grant the following on the integration user’s profile or via a separate permission set.
Objects the connector reads
The Salesforce connector supports indexing a range of standard objects, including:
- Account
- Contact
- Case
- Lead
- Opportunity
- Report
- Profile
Additonally, metadata objects (PermissionSet, User, UserRole, Group, EntityDefinition, etc.) are indexed in support of delivering secure permissions. These objects must be readable under any permissions scheme.
Permissions
The connector’s default behavior is to index every record in the org and compute per-record ACLs from Salesforce’s sharing model. The integration user must therefore be able to read every record which is desired to be indexed.
For the common case of indexing an entire organization, grant the integration user a permission set with:
- Object permissions on Account, Contact, Case, Lead, Opportunity, and Report: Read plus View All Records. Object-level Read alone restricts the user to records they own or that are shared with them; View All Records is what lets the connector see every record regardless of the sharing model.
- The API Enabled system permission (granted by default under the Salesforce Integration user license).
The metadata Atolio reads to compute ACLs (PermissionSet, PermissionSetAssignment, ObjectPermissions, Profile, UserRole, EntityDefinition, Folder, Group, GroupMember) is served through the standard Data API and is queryable by any user with API access.
Scoping to a subset of records
If instead you want Atolio to index only a subset of records (e.g. one region’s accounts, one business unit’s opportunities), omit View All Records on the corresponding objects and let Salesforce’s sharing model do the scoping. Configure the integration user’s visibility through the standard Salesforce mechanisms: placing them at an appropriate role in the hierarchy, defining ownership-based or criteria-based sharing rules, or manually sharing records with them. The connector will then index only what that integration user can see. Object-level Read is still required.
If the integration user is scoped down, the connector will still run to completion and will silently omit records the integration user is not entitled to see via ownership, the role hierarchy, or sharing rules.
To restrict which fields get indexed:
- Restrict the integration user’s field-level security on their profile, and/or
- Use the
field_filtersoption in the source configuration (see below).
The field_filters configuration option
field_filters lets you tell the connector which fields of a given Salesforce object should be indexed as metadata on the corresponding Atolio record. It is applied per-object, using the Salesforce API name of each object as the key.
Each entry accepts two optional lists:
included: an allow-list of field API names. If omitted or empty, every field returned by the Salesforce describe call is included.excluded: a deny-list of field API names. If omitted or empty, nothing is excluded.
Exclusion takes precedence over inclusion — if a field appears in both lists, it is excluded.
Example:
field_filters:
  Account:
    included:
      - Name
      - Industry
      - AnnualRevenue
      - Website
    excluded:
      - Description
  Opportunity:
    excluded:
      - ForecastCategoryName
      - NextStep
In this example:
- For
Account, only the fourincludedfields are indexed (andDescriptionwould be excluded even if it were listed inincluded). - For
Opportunity, every field is indexed exceptForecastCategoryNameandNextStep. - Any object not listed in
field_filters(e.g.Contact,Case,Lead,Report) has all of its fields indexed by default.
Use field API names (as they appear in Salesforce’s schema, including the __c suffix for custom fields), not display labels.
Custom Objects
Beyond the standard objects listed above, the connector can index your org’s custom objects. Each declared custom object is indexed as its own Atolio resource type, with ACLs computed from Salesforce’s sharing model exactly as for standard objects.
Declare custom objects with the custom_objects option in the source configuration. Each entry accepts:
sf_name(required): the Salesforce API name of the object, e.g.Galactic_Character__c. Must end in__c.display_name(optional): a human-readable name shown as the object label. Defaults tosf_name.title_field(optional): the API name of the field to use as each record’s title. Defaults toName. If the chosen field is empty on a record, the record’s Salesforce ID is used instead.
Example:
custom_objects:
  - sf_name: Galactic_Character__c
    display_name: Galactic Character
    title_field: Character_Name__c
  - sf_name: Spaceship__c
Use field_filters (see above), keyed by the object’s sf_name, to control which fields are indexed:
custom_objects:
  - sf_name: Galactic_Character__c
    display_name: Galactic Character
    title_field: Character_Name__c
field_filters:
  Galactic_Character__c:
    included:
      - Character_Name__c
      - Home_Planet__c
      - First_Appearance_Date__c
Provide Configuration
To obtain the necessary client credentials:
- From the External Client App Manager, open your Atolio app and go to the “Settings” tab.
- Under “OAuth Settings”, click “Consumer Key and Secret” → “Manage Consumer Details”.
- Copy the “Consumer Key” and “Consumer Secret” to be shared with your Deployment Engineer.
Provide the following values to your Deployment Engineer for them to configure in Atolio:
base_urlis the URL of your Salesforce tenant, e.g. https://yourcompany.my.salesforce.com.client_idis the “Consumer Key” of the External Client App you created.client_secretis the “Consumer Secret” of the External Client App you created.
Streaming Configuration
To periodically sync updates in Salesforce to the Atolio index, we need to set the cron-spec. The recommended value is (*/10 * * * *). This would fetch updates from Salesforce every 10 minutes. We also need to set complete_backfill_frequency. This, alongside the cron-spec, controls how often the connector performs a complete backfill of the data (to capture ACL changes). For example, setting a value of 24 would mean that every 24th call to backfill would be a complete fill. This combined with a cron-spec of every 10 minutes, a complete backfill would happen every 4 hours. The recommended value is 48 so a complete backfill happens every 8 hours. This value can be tweaked to reduce the number of API calls. Generally, we want to use a higher value for larger datasets so the connector performs a complete backfill less frequently.
2.17 - ServiceNow Connector
Search across your ITSM tasks (incidents, service requests, etc.) and knowledge base articles in ServiceNow.
The ServiceNow connector will index:
- IT Service Management (ITSM) tasks - such as incidents, service requests, problems - including work notes and comments.
- Knowledge bases (KBs) and KB articles.
The ServiceNow connector supports all releases from ServiceNow San Diego to the latest.
Note: If you need support for additional modules (e.g. Security Operations) with fields that aren’t indexed in the base tasks, contact your Atolio support team.
Install ServiceNow Update Set
The Atolio ServiceNow plug-in is available as an update set (XML file). The update set will be provided by your Deployment Engineer (from the Atolio GitHub repository) or your Atolio support team. From ServiceNow documentation, follow the steps below to Commit an update set.
- Elevate privileges to the
security_adminrole:

- Navigate to
System Update Sets>Retrieved Update Sets. - Click the link to
Import Update Set from XML. Upload the XML file provided previously. - The application is now available as a retrieved update set with state Loaded. Click on
Atolio Connectorto open the update set. - If necessary, skip or accept updates to resolve any problems.
- Click
Commit Update Setto install the application.
Note: You can view the Commit log by navigating to
System Update Sets>Update logand filtering to theAtolio ConnectorUpdate set.
Setup Application Credentials
First, create an application user by:
- Navigating to
System Security>Users and Groups>Users. - For
User ID, choose an appropriate name, e.g.atolio_connector. ClickSubmit. - In the new user record that you just created:
- Under
Roles, clickEdit...and addx_penti_atolio.atolio_connectorto the Roles List before clickingSave. - Click
Set Passwordto generate a password for this application user.
Next, enable the connector API by:
- Under the
Atolio Connectorapplication, navigate toIntegration - Atolio Connector>Administration>Properties. - If necessary, enable the connector’s API and integration with ServiceNow Knowledge Management.

Provide Configuration
Provide the following values to your Deployment Engineer for them to configure in Atolio:
Instance URLis the URL of your ServiceNow tenant.Usernameis the User ID of the application user you created, e.g.atolio_connector.Passwordis the password of the application user you created.
2.18 - Slack Connector
Index public channels, private channels, and threads in Slack where the Atolio bot is present.
The Slack connector indexes messages across public channels, private channels, and threads. It will only index messages where the Atolio bot has been invited.
Choose a Change Notification Mechanism
For Atolio to get notified of changes happening on Slack in real-time, there are 2 options: “HTTP mode”, and “socket mode”. A detailed comparison of these options is available here.
If having a webhook is not ideal for your organization, you can opt in for socket mode.
Create Slack App
In order to target your specific Atolio deployment, the Slack connector for Atolio requires a custom Slack app created from a manifest.
First, create the Slack app according the following instructions:
- In the Slack app dashboard (https://api.slack.com/apps), click on “Create New App”.
- Select “From an app manifest” when prompted.
- Select the workspace where the app should be installed.
- Select the “YAML” option, and provide the app manifest based on your preferred change notification mechanism:
- Manifest w/ “HTTP mode”:
https://relay.search.example.com/connectors/slack/default/install/manifest.yml?socketMode=false - Manifest w/ “socket mode”:
https://relay.search.example.com/connectors/slack/default/install/manifest.yml?socketMode=true
- Click on “Create”. Once the app is created, open the “Basic Information” page of your new app - it can be accessed from the Slack app dashboard (https://api.slack.com/apps).
- Locate the “App Credentials” heading and store the client ID, client secret, and signing secret in a safe place. These will be used to configure Slack shortly.
- (For “socket mode” only) Generate an “app-level token” w/
connections:writescope (screenshot below). Store the value in a safe place. - (Optional) To provide an app icon, locate the “Display Information” heading and upload the app icon provided here.
Note: it may be required to distribute the app. This can be done by clicking
Manage Distributionin the Slack app dashboard.

Provide Configuration
Once the Slack app has been created, provide these configuration values to your Deployment Engineer:
DefaultTeamIDis the Slack team ID for your workspace (e.g.T012ABCDEG3)ClientId,ClientSecret, andSigningSecretare the secrets obtained in the previous step. If you’ve opted in to use “socket mode”, the list should include anAppLevelTokenas well.Tokenis a secret which will be populated by the next step. You may leave this blank.ConversationTypesare the types of conversations being indexed by the Atolio Slack Bot. If empty, this defaults topublic_channel,private_channel,mpim
Once configured, you will finalize the installation of the Slack connector by visiting the following URL (make sure to use your own DNS name for the host part of the URL and include the correct instance name): https://relay.search.example.com/connectors/slack/default/install/setup. Also make sure the Atolio Web application is authenticated (using your SSO provider) before navigating to this URL to avoid an authentication error. The URL https://relay.search.example.com/install/connectors/slack/default/install/oauth/callback must be listed as a Redirect URLin the Slack app manifest. For example, with Okta this was done as part of Okta - Create OAuth Client.
In order for Slack conversations to be indexed by the Atolio Slack Bot, the bot needs to be added to the conversation. By default, this is done manually, but the bot can also be configured to auto-join public channels through configuration. If the bot is added to a channel which is later filtered out by configuration, auto-leave can be configured similarly.
The Slack Team ID can for instance be copied from the URL after logging into your company’s Slack Web app. For instance navigate to https://app.slack.com/ and note down the team ID in the URL that you get redirected to (e.g. T012ABCDEG3 in https://app.slack.com/client/T012ABCDEG3/.../...).
Index Private Content
To enable the indexing of private content such as direct messages (DMs) and private channels, without manually adding the bot to the respective conversation, the following steps must be taken:
- Set
slack-authfeature flag on your Atolio deployment - Set
EnablePrivateContentflag on Slack connector configuration
Afterwards, each Atolio user will be prompted with further instructions when they login to Atolio.

2.19 - SolarWinds Service Desk Connector
Index content on your SolarWinds Service Desk instance.
SolarWinds Service Desk (SWSD) connector enables the indexing of Incidents, Service Catalog, Problems, Solutions, Releases and Changes on your SWSD instance.
Prerequisites
The following configuration should be set on your SWSD instance, by an admin user, before configuring the SWSD connector.
- Create a new admin user:
- Go to Setup -> Users & Groups -> Users.
- Create a new user with a descriptive name, such as “Atolio Admin User”. Make sure the user is given “Admin” role.
- Activate the newly created user through the link sent via email.
- Altough you can use an existing admin user, creating a new user solely for the purpose of Atolio integration is a best practice.
- Generate JWT:
- Login as “Atolio Admin User”.
- Go to Setup -> Users & Groups -> Users. From the user table, click on “Atolio Admin User” to open the details page.
- From the “Actions” menu, select “Generate JSON Web Token” item to generate an API token. Provide the token value to your Deployment Engineer.
Provide Configuration
Provide the following configuration to your Deployment Engineer:
- Your SWSD domain, e.g.,
company.samanage.com - JWT of “Atolio Admin User”
- A full screenshot of Setup -> Account -> Roles & Permissions page. This is needed by your Deployment Engineer to configure the connector with respect to your permission settings.

Optionally, you can provide a backfill configuration, as follows:
# Filter data to be backfilled.
# If not provided, defaults to 1 year.
backfill-start-time: "2024-01-01T00:00:00Z" # Filter out data not updated since 2023.

# Specify when to create "checkpoints".
# If not provided, defaults to 1 year.
backfill-step-duration: 30 # Create a checkpoint after 30 days of data is backfilled.
2.20 - Staffbase Connector
Index resources such as Users, Campaigns, Posts, and Comments from your Staffbase platform.
The Staffbase connector enables indexing of various resources from your Staffbase platform, including Users, Campaigns, Posts, and Comments. This integration allows you to search and access Staffbase content directly through Atolio.
Set Up Administrator API Key and Retrieve Base URL
To set up the Staffbase connector, you’ll need to create an API key with administrator privileges. Follow these steps:
Log in to your Staffbase account as an administrator.
Navigate to the Admin Panel:
a. Click your user profile at the top right, then click ‘Studio’ in the drop-down menu.
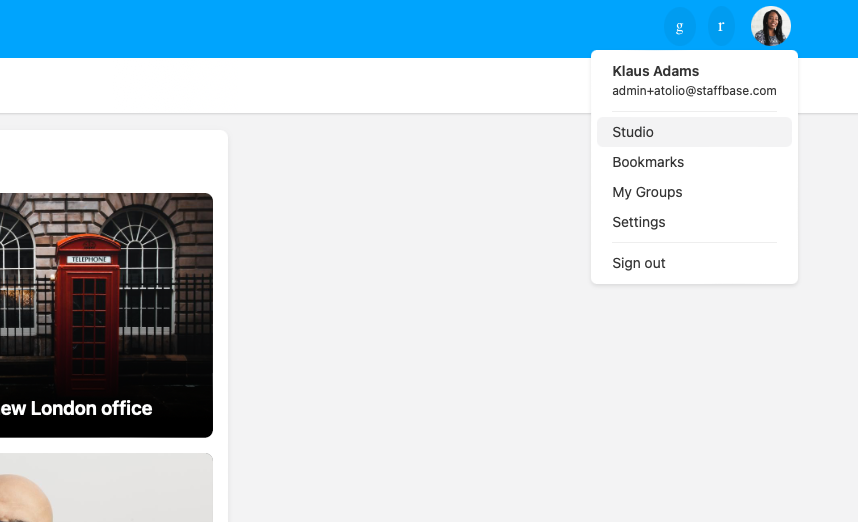
b. Click the gear icon at the top right corner.
c. In the new page, you will see a column on the left. Click the ‘API Access’ tab.

Click the “Create New API Key” button.
Provide a descriptive name for the key, such as “Atolio Connector”.
Under “Access”, select “Read-only” to ensure full access to all resources.
Click “Create”.
Copy and securely store the generated API key. Note that you won’t be able to view this key again, so make sure to save it in a secure location.
On the same page, you’ll also see the base URL for your instance:
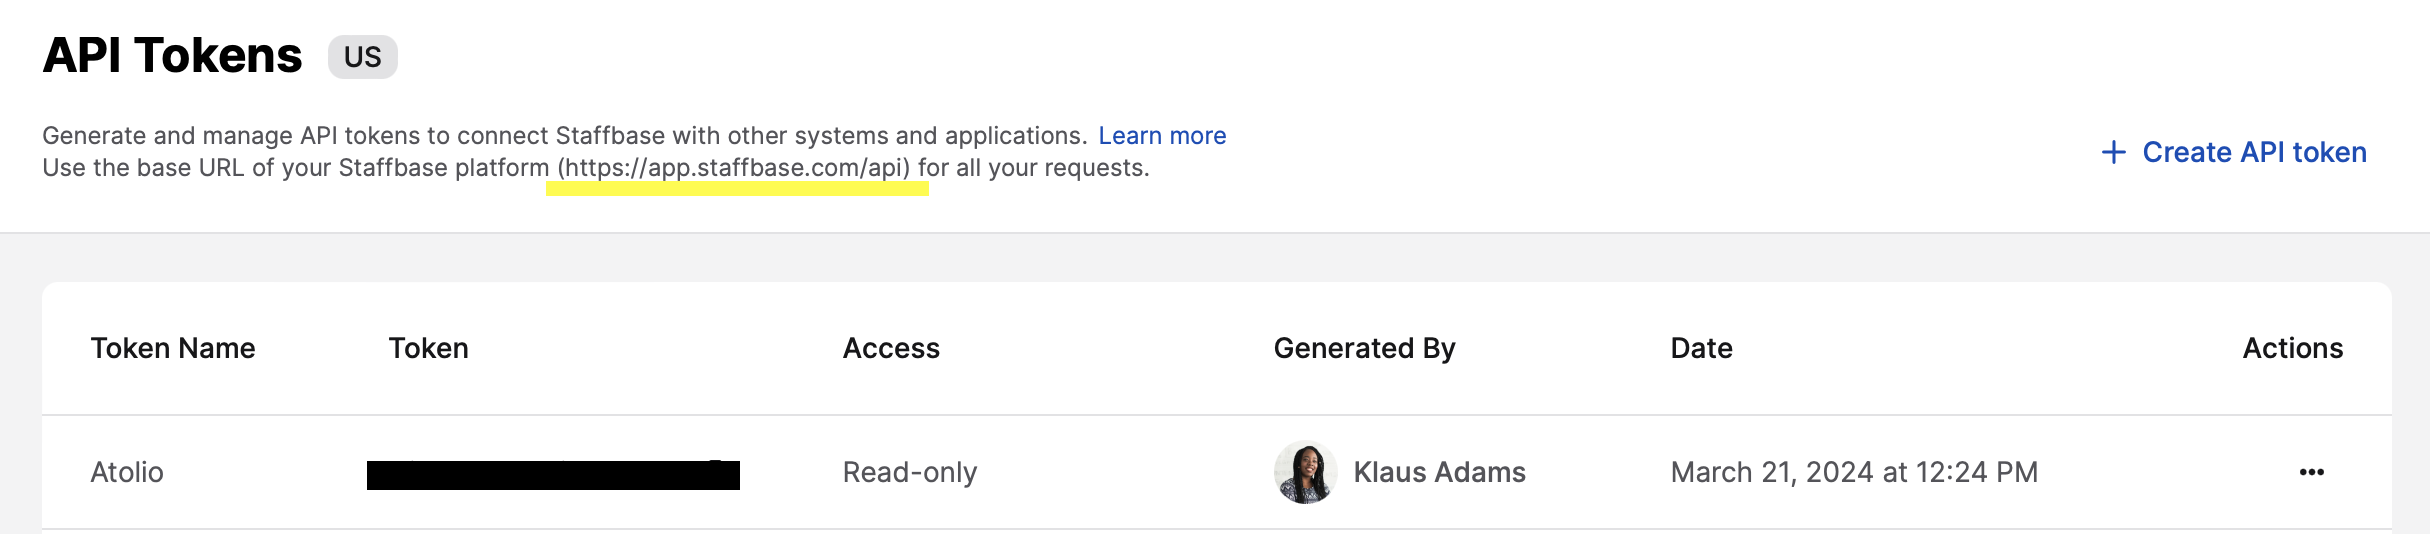
Provide Configuration
After creating the API key, provide the following information to your Deployment Engineer:
API Key: The administrator API key you just generated.Staffbase Instance URL: The URL of your Staffbase instance (e.g.,https://yourcompany.staffbase.com).
2.21 - Web Connector
Index internal or external websites by crawling HTML pages and content.
The Web connector enables the indexing of HTML web pages.
Enable Access
The Web connector indexes unauthenticated web page content which can be accessed from your Atolio deployment.
First, determine where your website is hosted. The Web connector can crawl HTML content by either:
- Navigating a website, starting from a configured
url. - Browsing an Amazon S3 bucket, from a configured
urlof the forms3://bucket/prefix.
Both modes require a baseURL as well. It bounds the crawl to that site, and it
is what page and file URLs are built from — in S3 mode it is prepended to bucket
keys to form the address each indexed document links to. A source configured
without a baseURL is reported as misconfigured and does not index.
In order to ensure that the content is accessible in your Atolio deployment, ensure that your Deployment Engineer is aware of the necessary network or AWS permissions as part of the infrastructure deployment.
Note: You may also need to ensure that your HTML content is server-side rendered (SSR) in order to index the complete website content.
(Optional) Provide Filters
Additional filters can be configured by your Deployment Engineer in order to:
- Include or exclude pages, e.g. particular URLs that match a given regex.
- Remove extraneous content, e.g. table of contents.
2.22 - Zendesk Connector
Index tickets and help center articles on your Zendesk instance.
Zendesk connector enables the indexing of tickets, and help center articles.
Prerequisites
The following configuration should be set on your Zendesk instance, by the account owner or an admin user, before configuring the Zendesk connector.
- Go to Zendesk admin panel
https://{your-zendesk-subdomain}.zendesk.com/admin/apps-integrations/apis/zendesk-api/settings
- Enable “API access”
- If you don’t see such an option, it means it’s already enabled.
- Enable “Token access”
- Create a new API token
- If you already have an API token other integrations, it’s still advised to create a new one for the Zendesk connector, and provide a descriptive name such as
atolio-connector-token. Note the token value since you cannot retrieve it after its creation. The token will be used to configure the connector.
- If you already have an API token other integrations, it’s still advised to create a new one for the Zendesk connector, and provide a descriptive name such as
- Create a new admin user
- If you already have an admin user for other integrations, it’s still advised to create a new admin user for the Zendesk connector, and provide a descriptive username such as
atolio-connector-admin-user@<your-org-domain>. The username will be used to configure the connector.
- If you already have an admin user for other integrations, it’s still advised to create a new admin user for the Zendesk connector, and provide a descriptive username such as
After the configuration, your API settings page should look like the following:

Provide Configuration
Provide the following configuration and answers to your Deployment Engineer:
- Your Zendesk subdomain
- API token, ideally the one you newly created under the name
atolio-connector-token - Admin user, ideally the one you newly created under the name
atolio-connector-admin-user@<your-org-domain> - Whether you want “Help Center” content to be indexed or not
- “Help Center” is an optional feature of Zendesk for hosting user-generated content (e.g., articles). If you use this feature and want your Help Center content to be indexed, mention this to your Deployment Engineer for them to configure it appropriately.
- If you’re not sure if your organization uses “Help Center” functionality, try visiting
https://{your-zendesk-subdomain}.zendesk.com/knowledge. A 404 error means your org is not using it.
Deployment engineer will also generate a “webhook secret”, and add it to the configuration. Please do not alter the configuration of any “webhook” or “trigger” starting with the word lumen. These are configured by the connector automatically, to index content changes in real-time.
Content Filtering
Atolio supports the ability to avoid certain content from being indexed at all. You can provide inclusions or exclusions with respect to each resource type.
- Users can be filtered w.r.t. their emails.
- Groups can be filtered w.r.t. their names.
- Organizations can be filtered w.r.t. their names.
- Tickets can be filtered w.r.t. their statuses (e.g., “open”, “closed”)
For Help center content:
- User Segments can be filtered w.r.t. their names.
- Articles can be filtered w.r.t. their section IDs.
- Section ID is a number that can be identified by executing the following command:
curl -L -u "{admin-user}/token:{admin-token}" https://{zendesk-subdomain}.zendesk.com/api/v2/help_center/articles/{article-id}.json | jq ".article.section_id"- Replace
{admin-user},{admin-token},{zendesk-subdomain}, and{article-id}values appropriately.
- Section ID is a number that can be identified by executing the following command:
An example of inclusions/exclusions file would be as follows:
resources:
    user:
        excluded:
            - super_secret_user@example.com
    group:
        included:
            - A group name
            - Another group name
    organization:
        included:
            - An organization name
    user_segment:
        included:
            - A segment name
    ticket:
        excluded:
            - closed  # ticket status
    article:
        excluded:
            - "12345" # section id
If you need content filtering, provide the inclusions & exclusions similar to the file above to your Deployment Engineer.
2.23 - Zoom Connector
Index Team Chat channels and direct messages, plus cloud recording transcripts and meeting summaries in Zoom.
The Zoom connector indexes Team Chat channels and direct messages, along with cloud recording transcripts and AI-generated meeting summaries.
Setup requires two Zoom apps, created in the Zoom Marketplace. You must be a Zoom Admin or Owner to create and configure them. No single Zoom app type can cover both roles:
- A Server-to-Server (S2S) OAuth app provides the org-wide read access used to backfill users, channels, messages, recordings, and summaries.
- A General app provides real-time streaming, so new messages and channel changes are indexed as they happen rather than waiting for the next backfill.
The streaming app is optional. If you configure only the S2S app, the connector runs in backfill-only mode.
Create the Backfill App (Server-to-Server OAuth)
- Go to the Zoom Marketplace and select Develop > Build App.
- Choose Server-to-Server OAuth.
- Give the app a name, for example
Atolio Backfill. - From App Credentials, record the Account ID, Client ID, and Client Secret.
- Open Scopes, select Add Scopes, and add the following:
| Scope | Purpose |
|---|---|
user:read:list_users:admin | List all users in the organization |
user:read:user:admin | Read individual user profiles |
team_chat:read:list_user_channels:admin | List the channels a user belongs to |
team_chat:read:channel:admin | Read channel details |
team_chat:read:list_members:admin | List channel members |
team_chat:read:list_user_messages:admin | Read channel and direct messages |
cloud_recording:read:list_user_recordings:admin | List cloud recordings and download transcript files |
meeting:read:summary:admin | Read AI-generated meeting summaries |
- Select Activate to enable the app, and confirm it shows the green Active status.
Note: One additional scope,
meeting:read:list_past_participants:admin, is required only if you enableshare-recordings-with-participants. See Recording Visibility.
Create the Streaming App (General App)
Skip this section if you only need backfill.
- Go to the Zoom Marketplace and select Develop > Build App.
- Choose General App.
- Give the app a name, for example
Atolio Streaming. - Select admin-managed as the app type, then select Save.
- From App Credentials, record the Client ID and Client Secret.
- Open Scopes, select Add Scopes, and add the following:
| Scope | Purpose |
|---|---|
team_chat:read:channel:admin | Receive channel created, updated, and deleted events |
team_chat:read:list_members:admin | Receive member invited, joined, removed, and left events |
team_chat:read:user_message:admin | Receive message posted, updated, and deleted events |
user:read:user:admin | Receive user created, updated, deleted, activated, and deactivated events |
Zoom grants the app’s marketplace and websocket scopes automatically. You do not need to add them by hand.
- Install the app on your account from the app page by selecting Install or Authorize.
Configure the WebSocket Subscription
Zoom’s API cannot create websocket subscriptions, so this step must be done in the Marketplace UI.
On the General app, go to Features > Access > Event Subscription and enable it with the slider.
Select Add New Event Subscription and give it a name, for example
Atolio WS.Choose WebSocket as the delivery method.
Select Add Events and add all 11 events:
User (5): user created, profile updated, deleted, activated, and deactivated.
Team Chat (6): channel message posted, updated, and deleted; DM message posted, updated, and deleted.
Save the subscription.
The connector detects this subscription automatically. If you have more than one and need to pin a specific subscription, record its ID and set websocket-subscription-id.
Configure the Webhook Subscription
Channel and member events are delivered by webhook only — they are not available over websocket. Configuring webhooks is what keeps channel and membership changes current between backfills.
By default the connector creates and maintains this webhook subscription for you, with the correct events. To use it, copy the Secret Token from the Event Subscription page and provide it as the webhook_secret value below.
Auto-provisioning requires that your deployment’s public URL is configured, which your Deployment Engineer sets with the platform’s --http-base-url flag. Atolio derives the webhook callback URL from it. If that URL is not set, the connector logs a warning and continues with backfill for channels and members.
Zoom validates the endpoint before delivering events; the connector answers that challenge automatically.
Note: To manage the subscription yourself instead, set
auto-provision-subscriptiontofalseand create a Webhook subscription in the Marketplace UI containing the 3 chat channel events (created, updated, deleted) and the 4 chat channel member events (invited, joined, removed, left).
Provide Configuration
Once both apps exist, provide these values to your Deployment Engineer:
| Secret | Source | Required |
|---|---|---|
account_id | Backfill app > App Credentials | Yes |
client_id | Backfill app > App Credentials | Yes |
client_secret | Backfill app > App Credentials | Yes |
general_admin_client_id | Streaming app > App Credentials | For streaming |
general_admin_client_secret | Streaming app > App Credentials | For streaming |
webhook_secret | Streaming app > Event Subscription > Secret Token | For channel and member streaming |
Without webhook_secret, the connector cannot verify webhook signatures and does not start the webhook receiver.
Content Filtering
The Zoom connector supports filtering on the user and conversation resources.
Users are matched by email address, and conversations are matched by channel ID — not by channel name:
resources:
  user:
    excluded:
      - contractor@example.com
  conversation:
    excluded:
      - a1b2c3d4e5f6g7h8
Channel IDs are assigned by Zoom rather than chosen, so a channel’s display name will not match. If you are unsure of a channel’s ID, ask your Deployment Engineer to retrieve it.
Excluding a user also excludes that user’s direct messages and recordings. In the absence of both included and excluded, everything the app’s scopes grant access to is indexed.
Recording Visibility
By default, a recording’s transcript and summary are only visible in Atolio to the meeting host.
To widen this to everyone who attended the meeting, set share-recordings-with-participants to true. This also requires adding the meeting:read:list_past_participants:admin scope to the backfill app — the connector fails with an explicit error if the scope is missing.
Only meetings with a cloud recording are indexed.
Optional Settings
These settings are optional and have working defaults. Provide them to your Deployment Engineer only if you need to change the connector’s behavior.
| Setting | Default | Purpose |
|---|---|---|
backfill-days | 180 | How many days of message history to retrieve |
share-recordings-with-participants | false | Grant recording access to meeting participants, not just the host |
websocket-subscription-id | auto-detected | Pin a specific websocket subscription |
auto-provision-subscription | true | Let the connector create and maintain the webhook subscription |
subscription-name-prefix | atolio | Prefix for auto-provisioned subscription names |
max-recording-download-bytes | 5242880 (5 MB) | Maximum transcript size to download; raise this if transcripts are truncated |
message-workers | 25 | Parallel workers for message retrieval; higher values use more API quota |
rate-limit | auto-tuned | Fixed requests-per-second, overriding auto-tuning |
2.24 - Zulip Connector
Index streams, topics, and messages in Zulip.
The Zulip connector indexes content from your Zulip organization using Zulip API credentials.
Atolio recommends using a dedicated Zulip bot for this connector rather than a personal user account.
Create Zulip credentials
Create credentials for either:
- a generic bot (recommended), or
- a dedicated service user.
You can retrieve Zulip API credentials using Zulip’s API key documentation: https://zulip.com/api/api-keys.
When creating the account used by Atolio:
- Use a dedicated bot or service account such as
atolio-botoratolio-export-bot. - Record the account email address.
- Record the account API key.
- Record your Zulip organization URL (for example,
https://example.zulipchat.com).
Visibility and access
The Zulip connector can only index content visible to the configured bot or user:
- Public streams are indexed.
- Private streams are indexed only if the configured bot or user has been added to them.
- Private messages (DMs) are not indexed by default but can be enabled per-user (see Index Private Messages below).
Because of this, Atolio recommends using a dedicated generic bot with the appropriate stream access.
Provide Configuration
Provide the following values to your Deployment Engineer:
Domain: your Zulip organization URL (for example,https://example.zulipchat.com)Email: the email address of the Zulip bot or service userToken: the Zulip API key for that bot or user
Content Filtering
The Zulip connector supports filtering at the topic resource level.
Topics can be included or excluded using the format:
resources:
  topic:
    excluded:
      - engineering/Incident review
Each entry should be specified as:
stream/topic
For example:
resources:
  topic:
    excluded:
      - eng-general/Search Results Feedback (query)
If you need topic-level filtering, provide the inclusions or exclusions to your Deployment Engineer as part of the connector configuration.
Index Private Messages
By default, the Zulip connector does not index private messages (DMs). To enable DM indexing, each user who wants their private messages indexed must provide a personal Zulip API key.
Unlike Slack, Zulip does not currently support an OAuth-based authentication flow for this purpose. Each user must retrieve their API key manually and share it securely with their Atolio deployment administrator.
Retrieve your Zulip API key
Each user should follow these steps:
- In Zulip, open the Settings menu (gear icon in the top right).
- Navigate to Personal Settings → Account & privacy.
- Click Manage your API key at the bottom of the page. Your API key will be displayed — copy it.
Warning: Your Zulip API key grants full access to your Zulip account. Share it only through a secure channel (for example, a password manager or encrypted message). Do not share it over Zulip, Slack, email, or other unencrypted channels.
- Share the API key securely with your Atolio deployment administrator.
Configure user tokens
Once user API keys have been collected, provide them to your Deployment Engineer. They are stored in the connector configuration as a user_tokens secret, mapping each user’s Zulip email address to their API key:
secrets:
  user_tokens:
    value: |
      "alice@example.com": "abc123XXXX"
      "bob@example.com": "def456XXXX"
After the configuration is updated, private messages for those users will be indexed on the next sync.
3 - Admin
Overview
The Atolio Administrator role gives users the ability to configure and monitor certain aspects of the Atolio stack. This page covers administrator configuration and the features supported by this role.
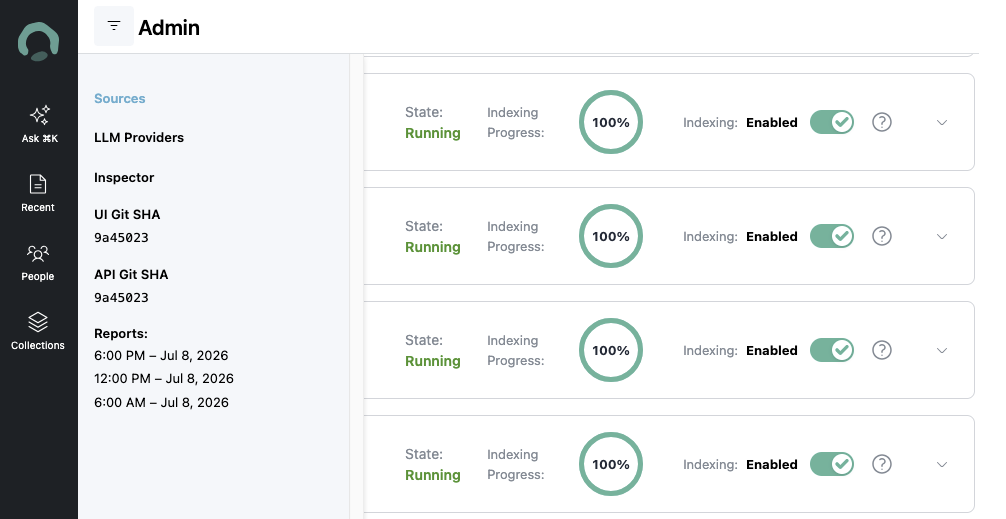
Admin Capabilities
Administrators have access to the following features and capabilities:
- LLM Provider Configuration: Configure and manage multiple LLM providers, set defaults, and switch between different LLM services. See AI Services / LLM Configuration for details.
- Connector Configuration: Configure, manage, and monitor data source connectors across your organization. See Configuring Sources for setup instructions.
- Build Version Information: Access the current build version and release information of your Atolio instance.
- Reports & Analytics: Generate and view reports on search activity, connector performance, and system usage.
- User Role Management: Assign and manage admin roles for other users who need administrative access.
- Connector Configuration: Configure and manage service providers / sources and identity provider (IDP) settings. See Configuring Authentication and Connectors for more information.
Managing Connector Configurations
The Admin console provides flexible YAML configuration management for all connector settings. You can edit, upload, and download configurations directly from the browser.
Buttons can be found in the Sources section which is the main page of /admin
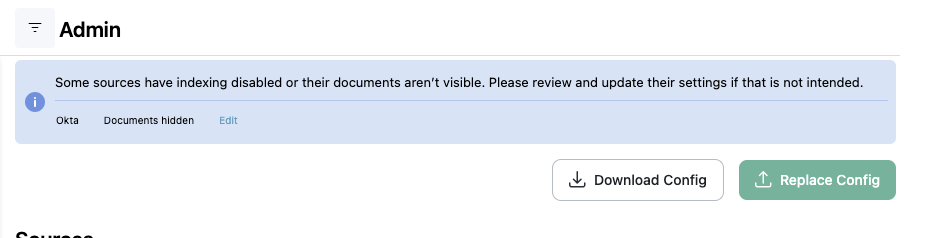
Edit Configurations
Warning: Changes made in the YAML editor are applied immediately to your deployment when you click “Upload Config”. Unlike file uploads where you can review before committing, direct edits take effect right away. Always verify your changes are correct before saving, as incorrect configurations may impact your connectors.
To edit connector configurations directly in the Admin console:
- Navigate to the Admin panel and select the “Replace Config” button
- Edit the configuration directly in the YAML editor
- Review your changes carefully before proceeding
- Click “Upload Config” to apply changes immediately
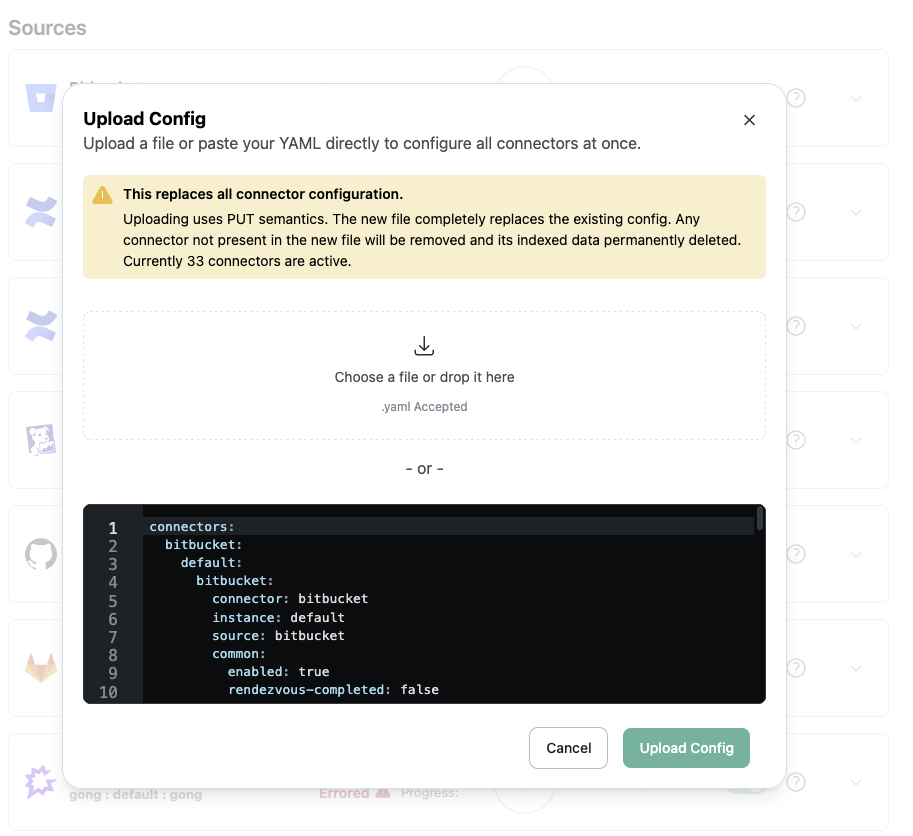
Upload Configurations
To import connector configurations from a YAML file:
- Navigate to the Admin panel and select the “Replace Config” button
- Use the “Choose a file or drop it here” to upload or drag a file in.
- Click “Upload Config” to save
This is useful for:
- Migrating configurations from another Atolio instance
- Restoring a previously downloaded backup
- Applying configurations exported from
atolioctl
Download Configurations
To export your current connector configurations as a YAML file:
- Navigate to the Admin panel and select the “Download Config” button
- Save to a relevant place to edit
This is useful for:
- Creating backups of your current configuration
- Editing without having to rely on K8s access
The downloaded YAML file uses the same format as atolioctl, so you can also manually edit and re-upload it, or use it with atolioctl if needed.
Configuration
Atolio Managed
The Admin role is restricted and should only be assigned to users who need to configure connectors or modify LLM settings. Gather the appropriate user IDs to send to your Atolio Support contact, as they are configured at the Helm values level and managed by our Deployment Engineers. See the How to Gather User IDs section for details.
Self-Maintained Cluster
Air-gapped or other self-maintained clusters require applying this configuration to the Helm values of the Atolio stack. Use the How to Gather User IDs section before proceeding.
- Edit the Lumen Helm values file for your deployment and append
adminUserIdsor create the fullmarvinblock. The value file location varies depending on whether you are using the legacy or newer version of the Atolio stack deployment. Values are comma-separated.
marvin:
  adminUserIds: atu_1...,atu_2...,atu_3...
- Redeploy
lumencharts to apply the Admin role to Atolio. - Have users log out and log back in if they were previously authenticated to pick up the new role.
How to Gather User IDs
Gathering user IDs is straightforward after an appropriate Authentication or IDP connector is configured.
- Click the profile icon in the bottom left of the Atolio UI and select “Your Profile”.
- You will be taken to a URL like
search.company.com/people/atu_abcdefghijkl... - Copy the full
atu...string from the URL, as this is your unique user ID. - Send this ID to your administrator or apply it via your Helm configuration if you have a self-maintained cluster.
- Additional users that are not you can be find in the “People” tab of Atolio in the same manner of using the
atu...value of their name.
4 - LLM Providers
Overview
Atolio makes it easy to securely configure and manage access to commercial LLMs of your choice. Atolio supports multiple LLM models across different providers, allowing you to select the best model for your organization’s needs.
High-level Configuration Workflow
To configure an LLM provider, navigate to the administration panel at your Atolio deployment URL (e.g., https://search.example.com/admin) and select LLM Provider from the menu.
Atolio uses different models for different kinds of work, and supports a range of providers. Models are updated as improved ones become available. Per provider, the following is currently made available within Atolio. Select Configure for your provider’s setup steps:
| Provider | Supported Models | Configuration |
|---|---|---|
| Anthropic |
| Configure |
| AWS Bedrock |
| Configure |
| Azure Foundry |
| Configure |
| Google Gemini |
| Configure |
| OpenAI |
| Configure |
 Anthropic
 AWS Bedrock
 Azure Foundry
 Google Gemini
 OpenAI
Configuring a Provider
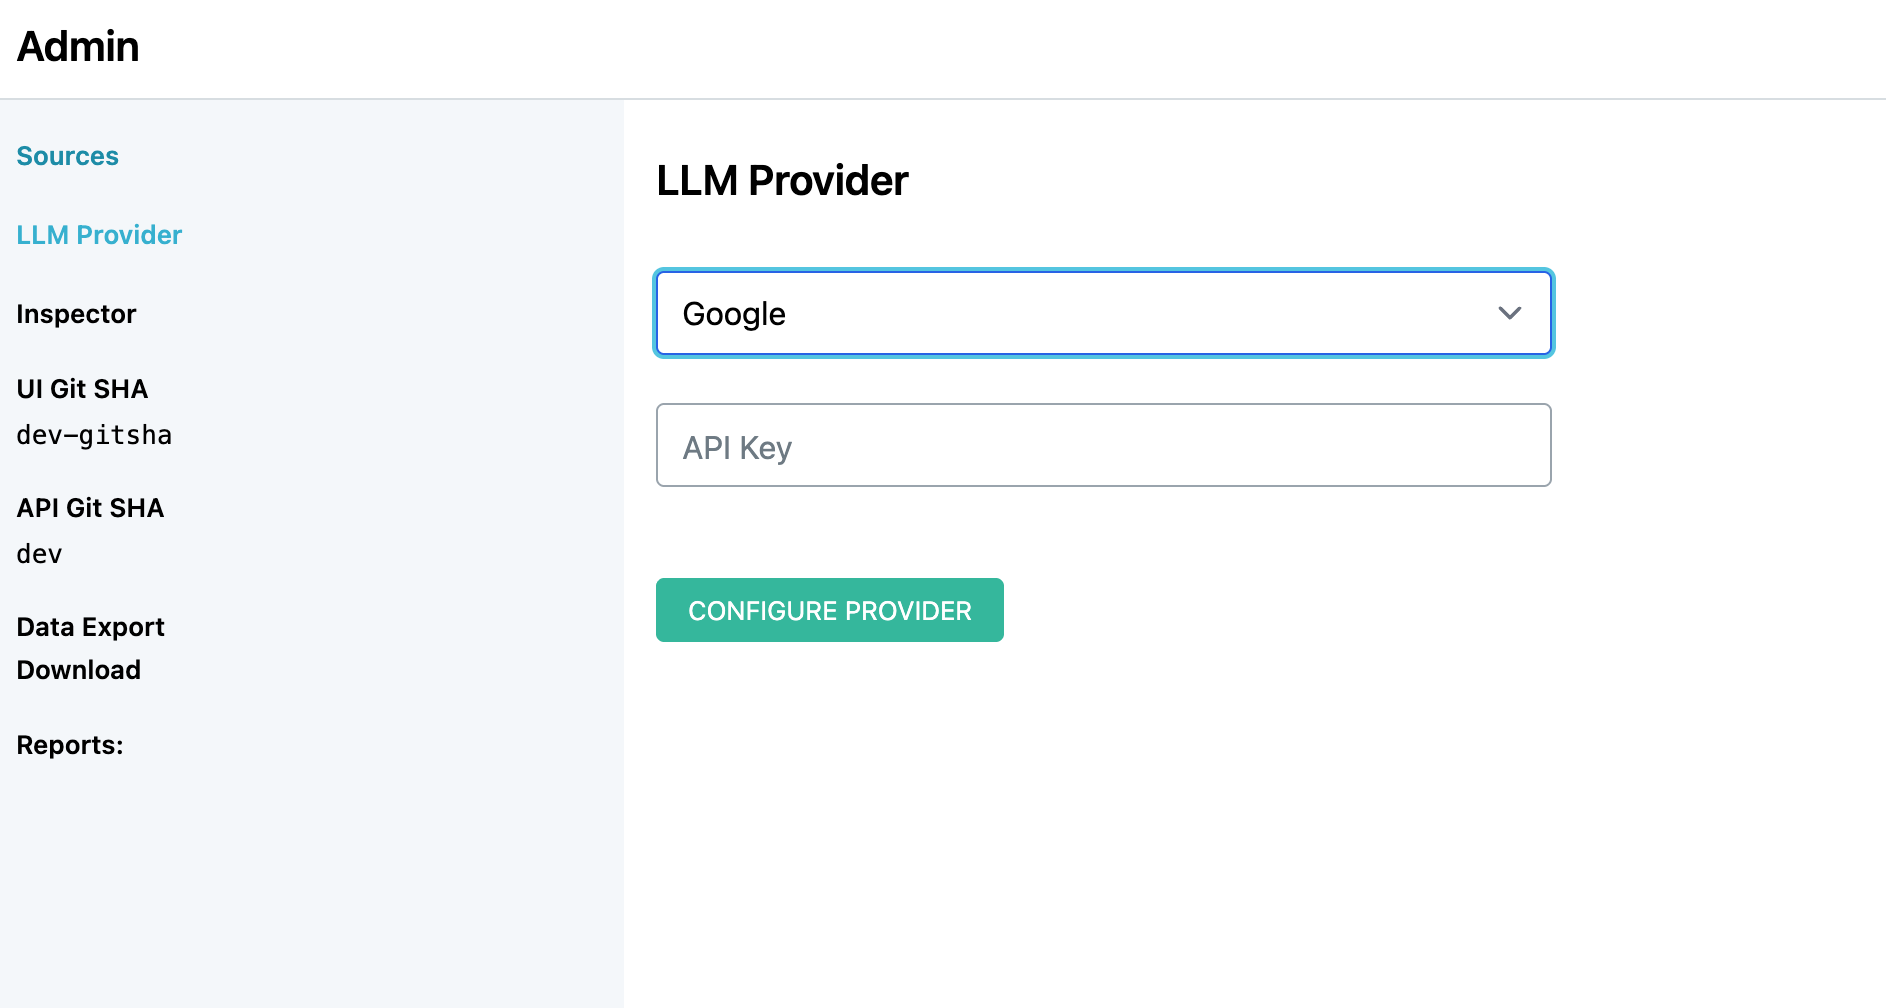
Most providers require an API key. AWS Bedrock is the exception: it uses the IAM role of your AWS deployment instead. To enable a provider:
- Open Atolio and head to the
Adminpanel - Select
LLM Providerfrom the left-pane menu - Select the LLM Provider and follow the steps on its page, linked in the table above.
Multiple LLM Models
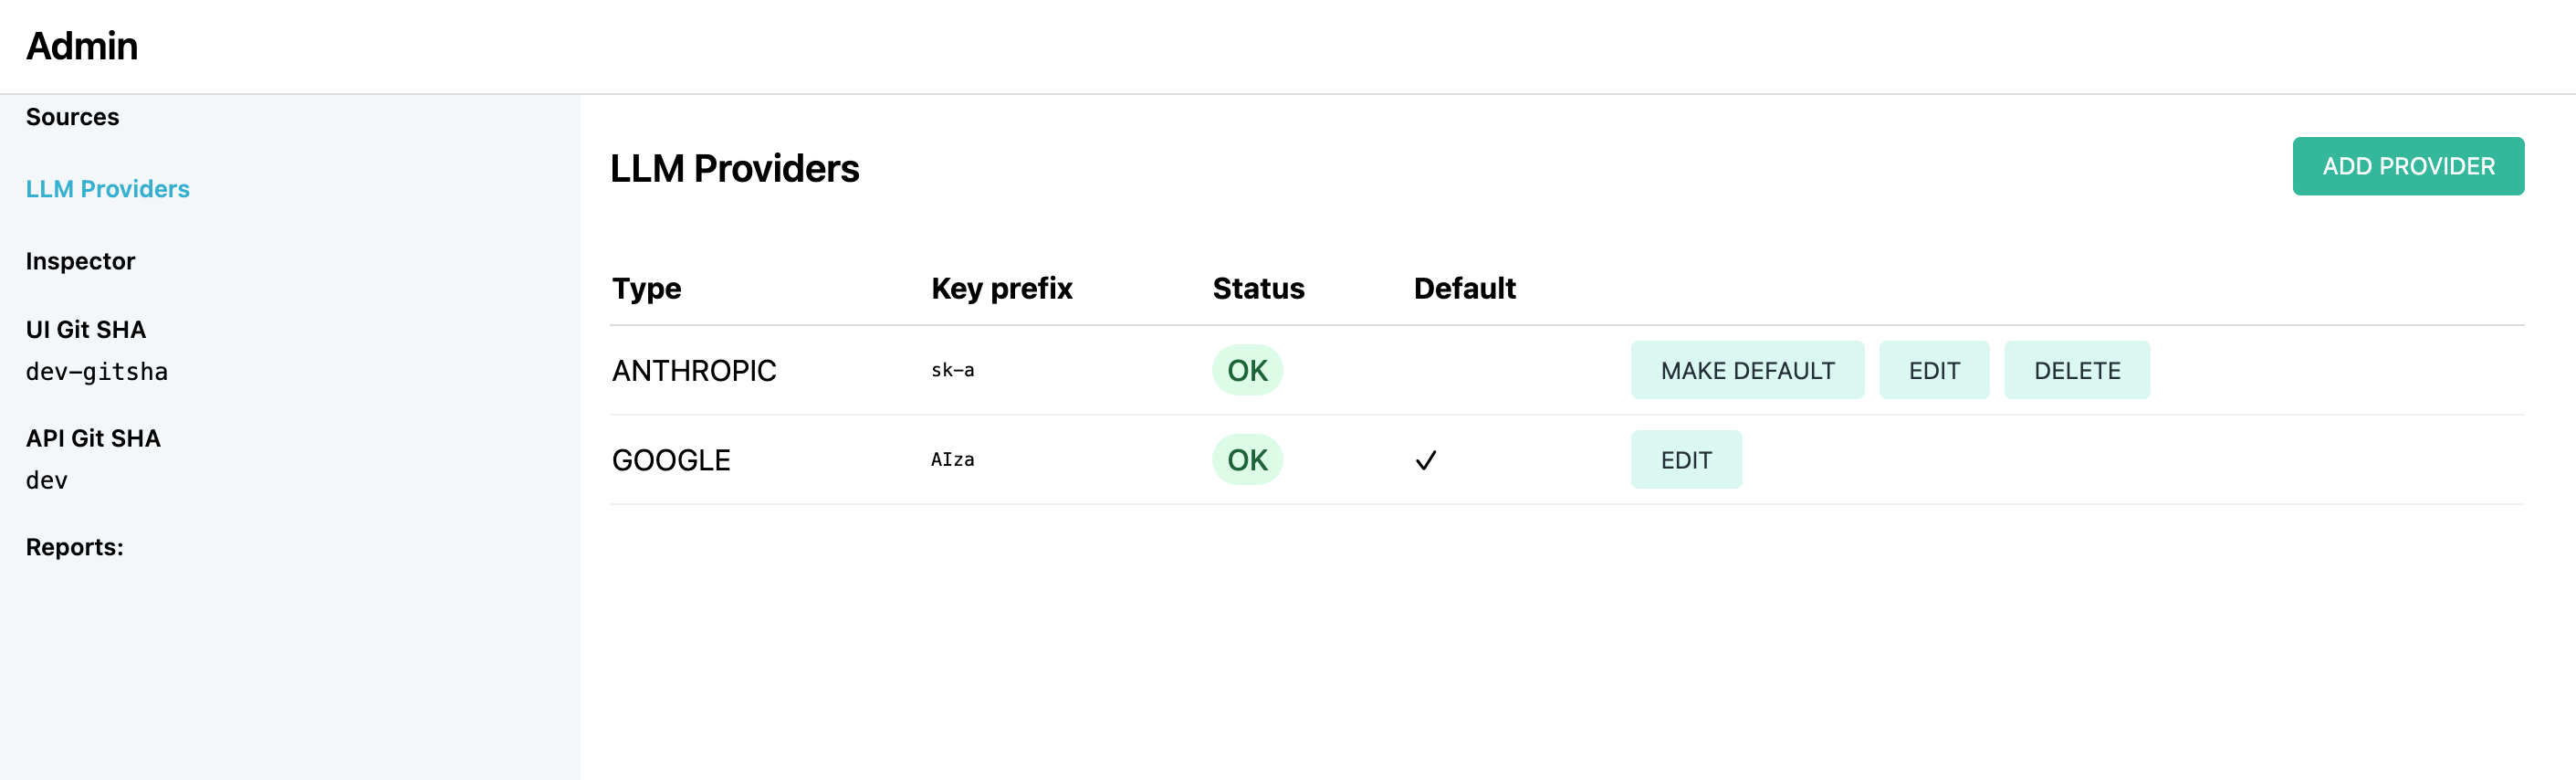
You can easily configure and manage multiple LLM providers within a single Atolio instance. While only one provider is active at a time, this flexibility enables you to test new providers, compare their performance, and maintain fallback options in case of credential expiration or service issues.
Key capabilities:
- Multiple Provider Support: Add as many LLM provider configurations as you need. Anthropic and AWS Bedrock share the same namespace, as do Azure and Azure OpenAI.
- Default Management: Easily switch between providers by setting any as the default with a single click. For existing systems, the first configured provider becomes the implicit default. When additional providers are added, the previous default is preserved.
- Protected Defaults: The currently active default provider cannot be removed to ensure continuity of service.
Changing Providers
As described in the Multiple LLM Models section, you can freely switch between configured LLM providers by setting a different provider as the default. This allows you to test new providers or change providers without requiring system reconfiguration.
4.1 - Anthropic
Use Anthropic’s Claude models with an Anthropic API key.
Atolio connects to Anthropic’s Claude models directly with an Anthropic API key.
| Supported Models | Credentials |
|---|---|
| API Key |
Steps
- Create an Anthropic API key.
- Add the key to Atolio.
Create the API Key
- Sign in to the Claude Developer Platform at https://platform.claude.com/.
- Create a new API key and copy it.
Configure Atolio
- In Atolio, open the Admin panel and select LLM Provider.
- Choose Anthropic and enter the API key.
Note: Anthropic and AWS Bedrock share the same namespace. See Multiple LLM Models.
4.2 - AWS Bedrock
Use models hosted on Amazon Bedrock through your Atolio AWS deployment’s IAM role, with no API key.
Atolio can use models hosted on Amazon Bedrock. Bedrock does not use an API key: Atolio must be deployed on AWS, and it calls Bedrock as the Marvin service role marvin_svc_act. The Atolio Terraform deployment already grants this role permission to invoke Bedrock models.
| Supported Models | Credentials |
|---|---|
| None (uses the marvin_svc_act IAM role) |
Steps
- Enable the model in Bedrock.
- For AWS Marketplace models only, grant Marketplace permissions.
- Enable AWS Bedrock in Atolio.
Enable the Model
In the AWS console, open the Amazon Bedrock playground and invoke the selected model once. This enables the model for your account and accepts its terms of use.
Grant Marketplace Permissions
Skip this step unless the selected model is an AWS Marketplace model, for example a third-party model with Marketplace billing.
Append the following statement to the existing marvin_svc_act role:
{
    "Version": "2012-10-17",
    "Statement": [
        {
            "Effect": "Allow",
            "Action": [
                "aws-marketplace:ViewSubscriptions",
                "aws-marketplace:Subscribe"
            ],
            "Resource": "*"
        }
    ]
}
Do not remove existing permissions
Add this statement alongside the role’s existing policies. Removing or replacing them stops Atolio from invoking Bedrock models.
Configure Atolio
- In Atolio, open the Admin panel and select LLM Provider.
- Choose AWS Bedrock, select the model family (Anthropic or OpenAI), and enable it. The region is selected automatically from the region Atolio is deployed in.
For more details, see the Amazon Bedrock User Guide.
Note: Anthropic and AWS Bedrock share the same namespace. See Multiple LLM Models.
4.3 - Azure Foundry
Use OpenAI models deployed in your own Azure AI Foundry resource.
Atolio can use OpenAI models that you deploy in your own Azure AI Foundry resource, so requests stay within your Azure tenant.
Note: In the Atolio Admin panel, this provider is currently listed as Azure OpenAI.
| Supported Models | Credentials |
|---|---|
| Endpoint URL and API Key |
Steps
- Create an Azure AI Foundry resource.
- Deploy both models.
- Add the endpoint and key to Atolio.
Create the Foundry Resource
- Open the Azure AI Foundry Portal at https://ai.azure.com/ and create a new Azure AI Foundry resource.
- Choose the subscription, resource group, region, and resource name, then create the resource.
Deploy the Models
Atolio needs both models deployed in the same resource.
- From the service home page, open Deployments from the left-hand menu.
- Create a base model deployment for
gpt-5.6-sol. - Create a second base model deployment for
gpt-5.6-luna. - On the model deployment page, under Endpoint Settings, copy the API key and the base Endpoint URL.
Configure Atolio
- In Atolio, open the Admin panel and select LLM Provider.
- Choose Azure OpenAI (the Azure Foundry provider) and enter the Endpoint URL and API key.
Note: Azure and Azure OpenAI share the same namespace. See Multiple LLM Models.
4.4 - Google Gemini
Use Google’s Gemini models with a Google AI Studio API key.
Atolio connects to Google’s Gemini models with an API key from Google AI Studio.
| Supported Models | Credentials |
|---|---|
| API Key |
Steps
- Create a Google AI Studio API key.
- Add the key to Atolio.
Create the API Key
- Sign in to Google AI Studio at https://aistudio.google.com.
- Create a new project and API key, and copy the key.
Configure Atolio
- In Atolio, open the Admin panel and select LLM Provider.
- Choose Google and enter the API key.
4.5 - OpenAI
Use OpenAI’s GPT models with an OpenAI API key.
Atolio connects to OpenAI’s GPT models directly with an OpenAI API key. To use OpenAI models hosted in your own Azure tenant, see Azure Foundry.
| Supported Models | Credentials |
|---|---|
| Secret Key |
Steps
- Create an OpenAI secret key.
- Add the key to Atolio.
Create the Secret Key
- Open the API keys page at https://platform.openai.com/api-keys.
- Create a new secret key and copy it.
Configure Atolio
- In Atolio, open the Admin panel and select LLM Provider.
- Choose OpenAI and enter the secret key.